
AD
Hi there!
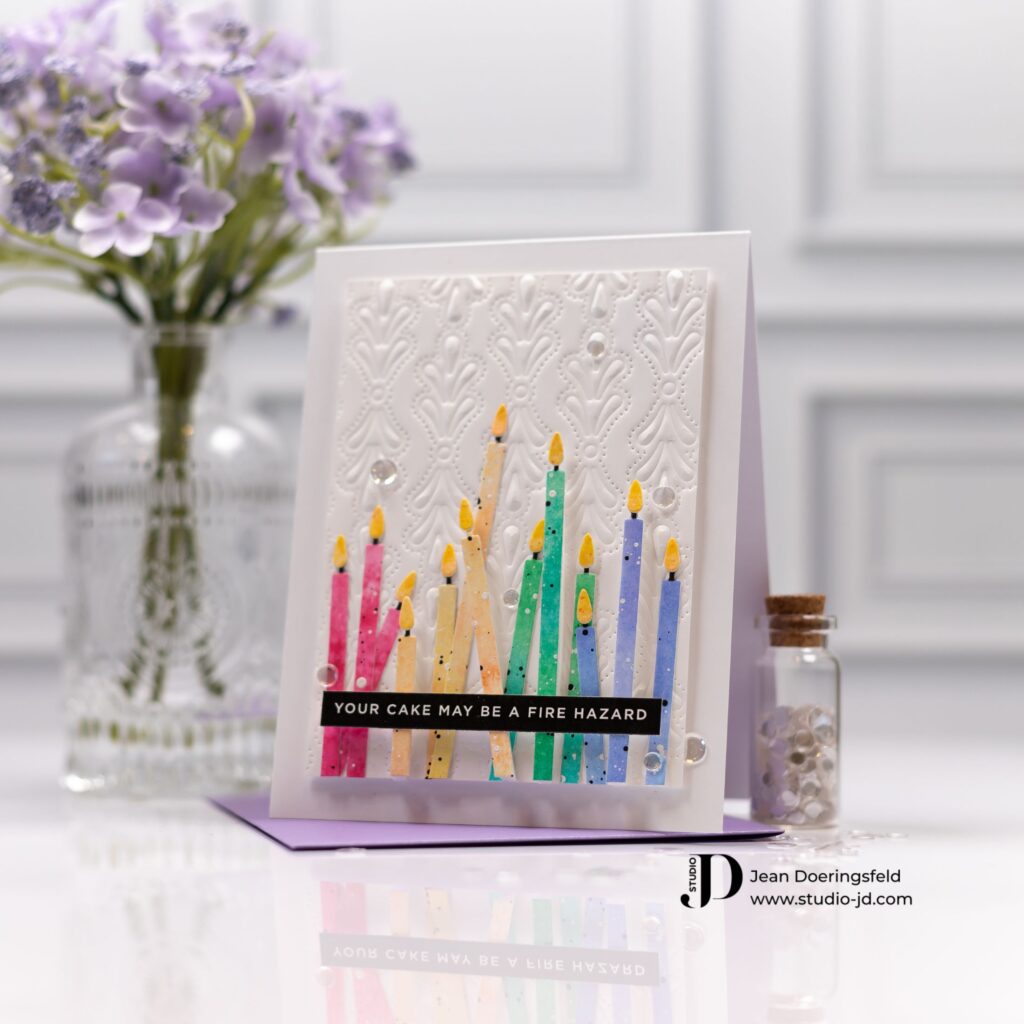
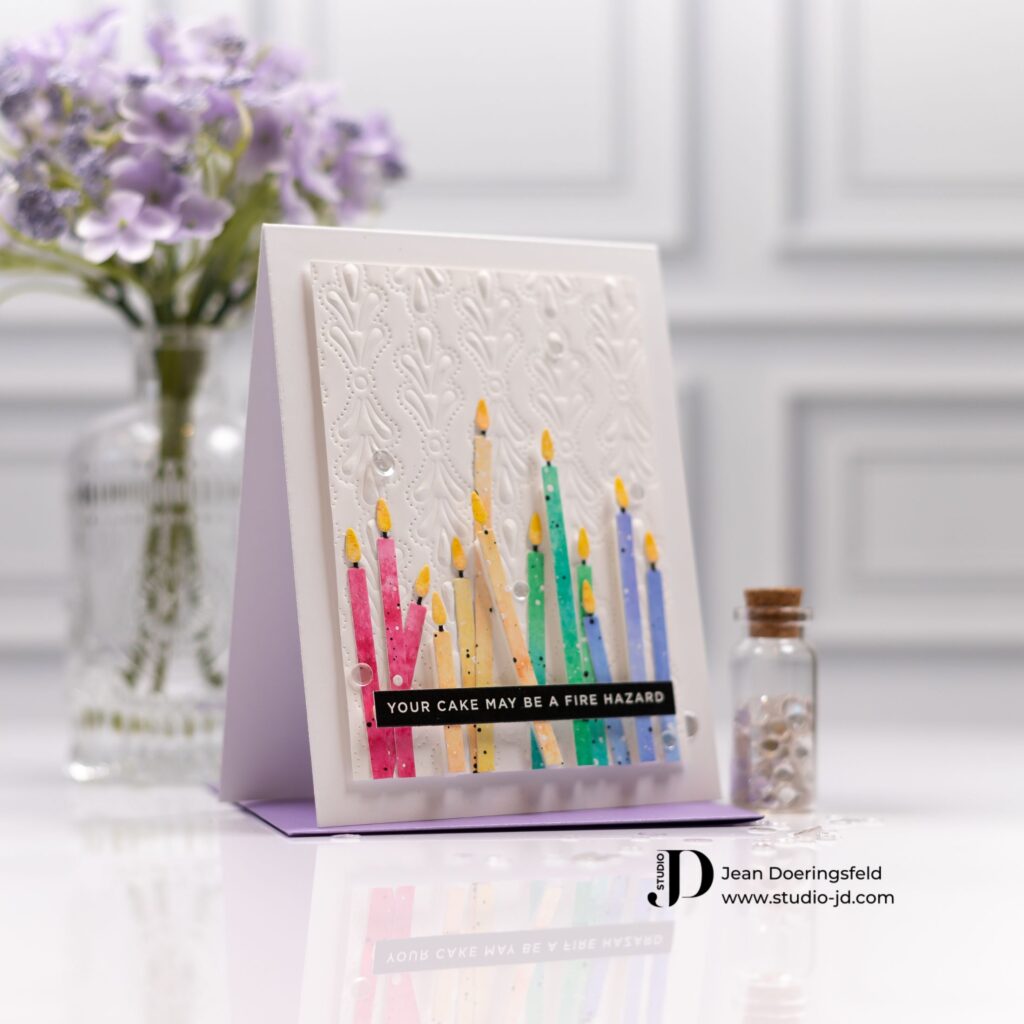
Today I’m sharing a fun – and funny – birthday card. This card features two new dies that are part of this month’s Simon Says Stamp DieCember release.
This die creates several candles at the same time so I couldn’t resist using most of them on a card. I paired them with the fun “Sassy Birthday” sentiments to add some whimsy and fun.
To make this card:
- Smoosh two tones of the same color ink onto a non-porous surface such as a glass mat. Spray it with water to mix the colors a bit.
- Lightly spray a piece of watercolor cardstock with water, then smoosh the cardstock into the color mix you created. You can lift and re-smoosh until you have the cardstock covered in color. The color will dry lighter so you might want to wait until the panel dries and then re-smoosh it. Once you’re happy with the color, set the panel aside to dry.
- Repeat steps 1 and 2 with other color combinations (see below for my combos).
- Set all the panels aside to dry
- Use a rubber embossing mat to emboss the Florance Plate die cut instead of cutting it. Your die cutting machine should have instructions for embossing a die cut so be sure to follow those as every machine is different.
- Trim the embossed panel and attach it to a card front using foam adhesive.
- Trim the sentiment from the sentiment sheet and use a black marker to go around the edge and cover the white cardstock core.
- When your panels are dry, splatter them with white paint, let dry, splatter with black paint, let dry, an then spray them with shimmer spray and set them aside to dry (again).
- Once your colored panels are completely dry (they really must be completely dry or they will not cut cleanly – I tried die cutting too soon and had to start over with one of my panels – I ended up leaving them to dry overnight), die cut the candles out of each color.
- Add a bit of black marker for the wick of each candle, then adhere the flames.
- Select several of each color candle and arrange them on your embossed panel. Adhere some directly to the panel with liquid glue and add narrow foam strips to a few others for dimension. I did not worry about getting the candles straight – I felt like having them a bit wonky added to the whimsy of the card.
- Add your sentiment strip to your card front – being sure to add foam adhesive where it may be needed for stability.
- Add a few gems for some added sparkle.
Here are the color smooshing combos I used (all are Simon Says Stamp Pawsitively Saturated Inks and are linked in the “supplies” section below)::
- Bubblegum + Cherry
- Sunbeam + Mandarin
- Ocean + Lucky
- Royal + Galaxy
- More Sunbeam + Mandarin for the candle flames
I hope you like this project and that it inspires you to create something fun and funny!
Have a wonderfully creative day, everyone!
")


0 Comments