

#ad
Hi there!
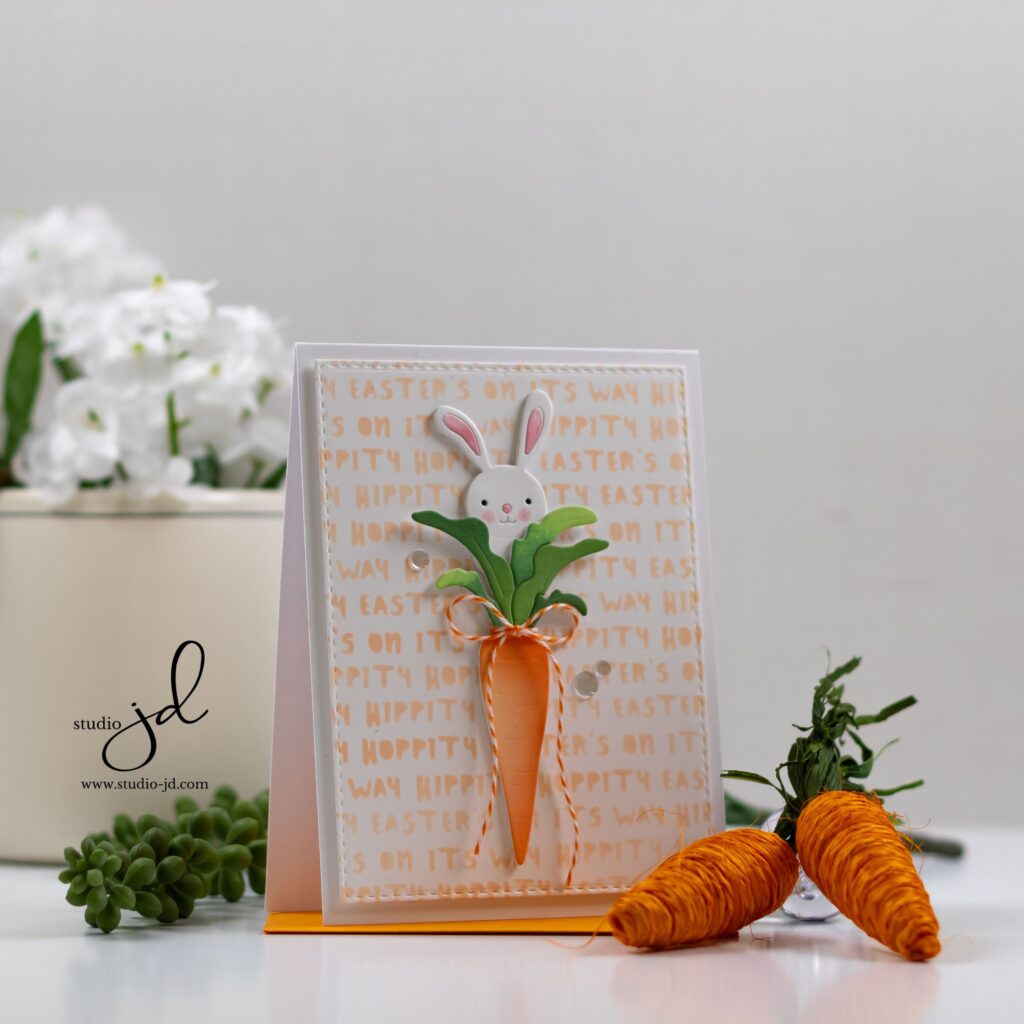
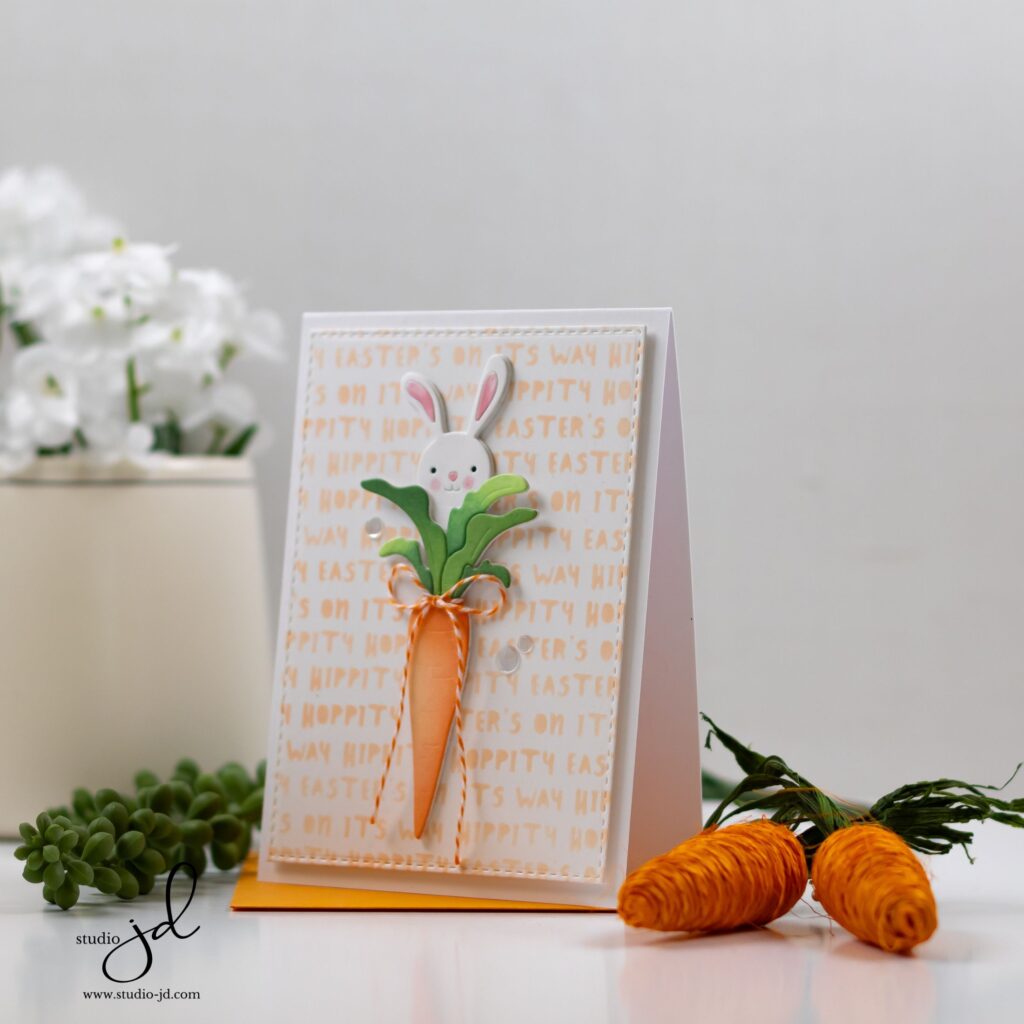
Sometimes everything that’s in my head comes out on paper exactly how I envisioned it so today I’m kicking off the new Simon Says Stamp “Splendor” release with one of my favorite cards of all time! It’s rare that everything comes out perfectly the first time for me, but it happened with this card.
Now I’m not sure I can part with it. I may have to frame it.
This card was super simple to make but every step was pure joy, so I’ll share it with you here and hope you have as good of luck with it as I did!
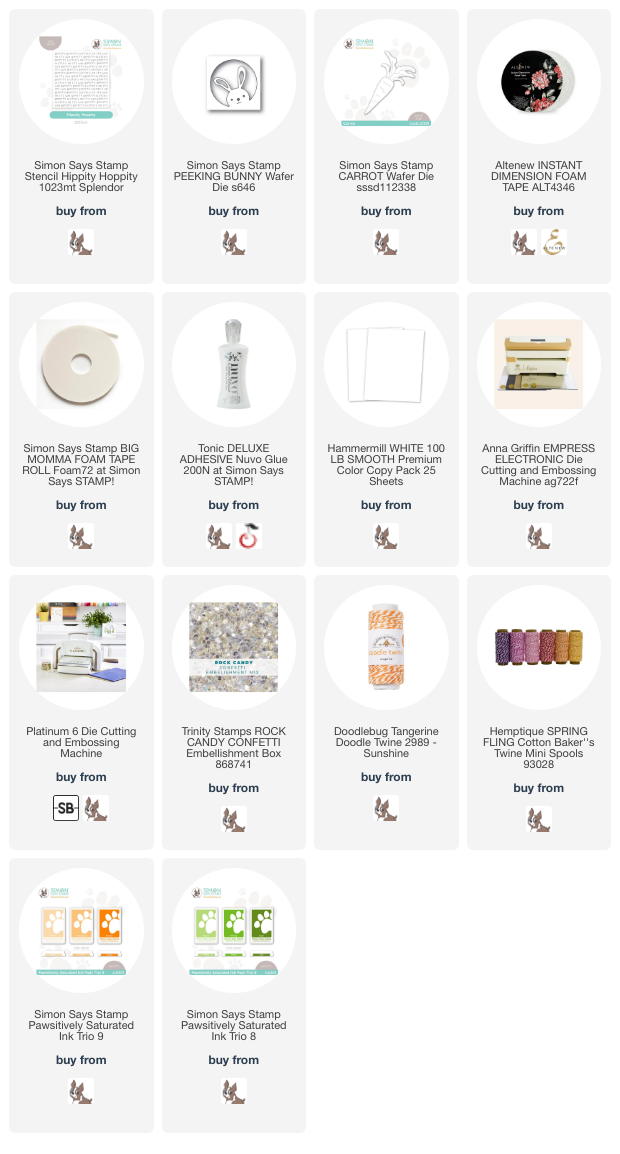
To make this card (all supplies listed in the Supply section below):
- Lightly ink blend the Hippity Hoppity stencil on a white card stock panel, then die cut it with a stitched die.
- Add the panel to a card base using foam adhesive.
- Die cut the carrot and bunny dies from white card stock.
- Trim the bunny out of the frame leaving a bit of extra cardstock on the bottom to tuck behind the carrot.
- Ink blend the carrot pieces using 2 different colors of green, and 2 shades of orange.
- Use a marker to add a pink nose, cheeks, and ears to the bunny.
- Add a small piece of black cardstock behind the bunny’s eyes to make them black.
- Use a sticky mat or a piece of post-it tape to assemble the carrot upside down so that the front side is stuck to the sticky mat/post it.
- Once all the carrot pieces are in place, add a few strips of card stock with liquid glue to attach the pieces and hold them together.
- Carefully remove the assembled carrot from the sticky mat/post-it once the glue has dried.
- Nestle the bunny behind the leaves on top of the carrot, adhering it with liquid glue.
- Trim any excess card stock from the bunny.
- Add a piece of bakers twine around the carrot and make a bow.
- Adhere the carrot and bunny to the card front using foam adhesive.
- Add a few gems for some sparkle.
Have you ever had a card that turned out exactly as it did in your head when you started? If so, add a quick comment and tell me about it!
Have a wonderfully creative day, everyone!

This is my favorite Easter card too, uniquely festive and positively delightful!!! Can I make some cards like yours? I put the supplies in my wish list.
(I normally craft with Anna Griffin products and the other day I went through an older box of cards. I said to my son, “Wow, I really like these and did good”.
Thank you so much! Yes! You can absolutely make cards like mine! I’m here to inspire you! Be sure to tag me if you post a picture on social media so I can see what you create!
I’m with you–this is my favorite Easter card ever! Right to the Pinterest board, and off to shop!