

AD: Collaboration Post
Hi there!
Today I’m sharing my second card project where I try my hand – for the first time EVER – painting with gouache. If you missed my first attempt – and the details on what gouache is and how it worked for me, you can find that post here.
Just like my previous gouache post, this post is being done in collaboration with Altenew! I absolutely love Altenew’s floral images and they have the BEST artist-grade inks, paints, and other supplies! Today I’m using their (somewhat new) Artists’ Gouache!
As part of the collaboration, Altenew is generously giving away (another) $25 Altenew gift card to one of my followers over on Instagram – so be sure to head over there for all the details and a chance to win! Giveaway ends October 10th! You can find my Instagram here: https://instagram.com/jean.studiojd
My last project using gouache gave me a bit of insight into how the paint moved, mixed, and generally…worked… when using it. That was a very simple project with not a lot of detail, so I decided to see how well I’d do on a project that required a bit more variation and staying in the lines.
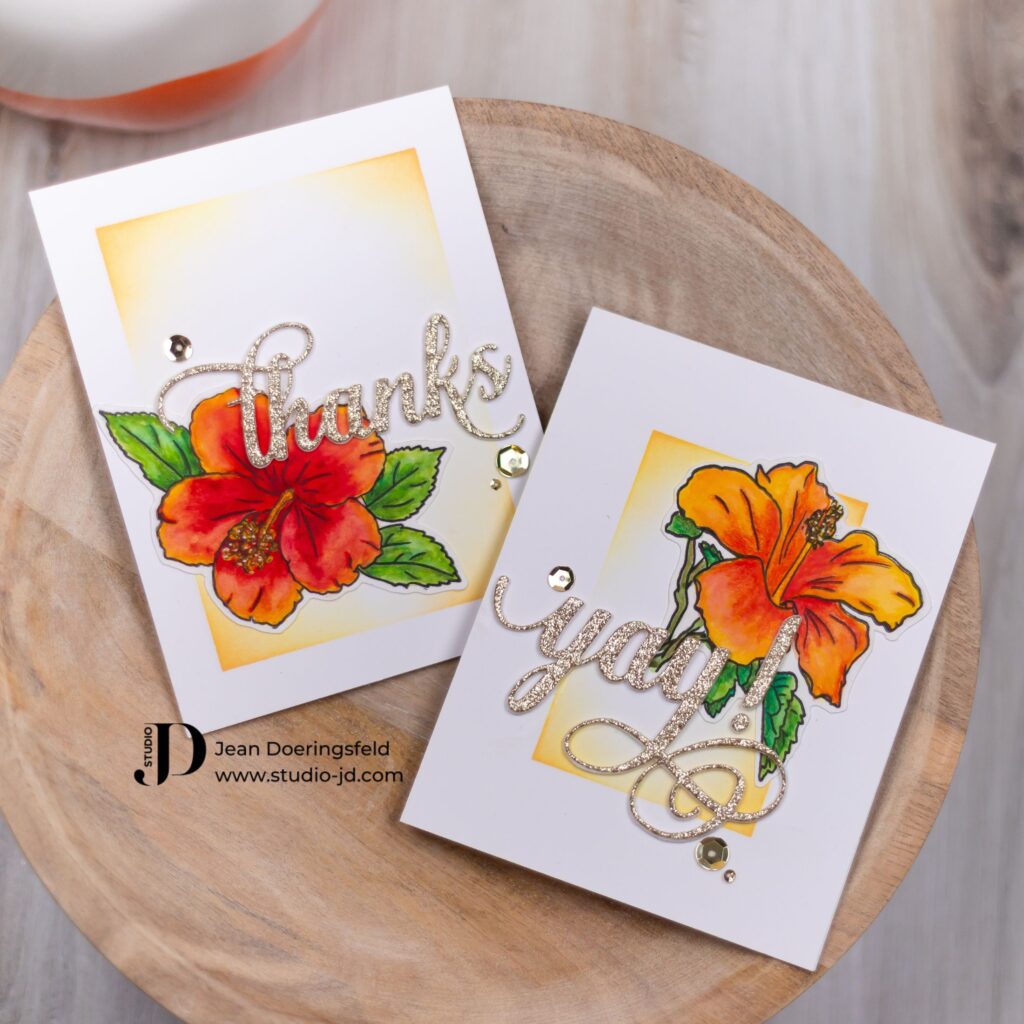
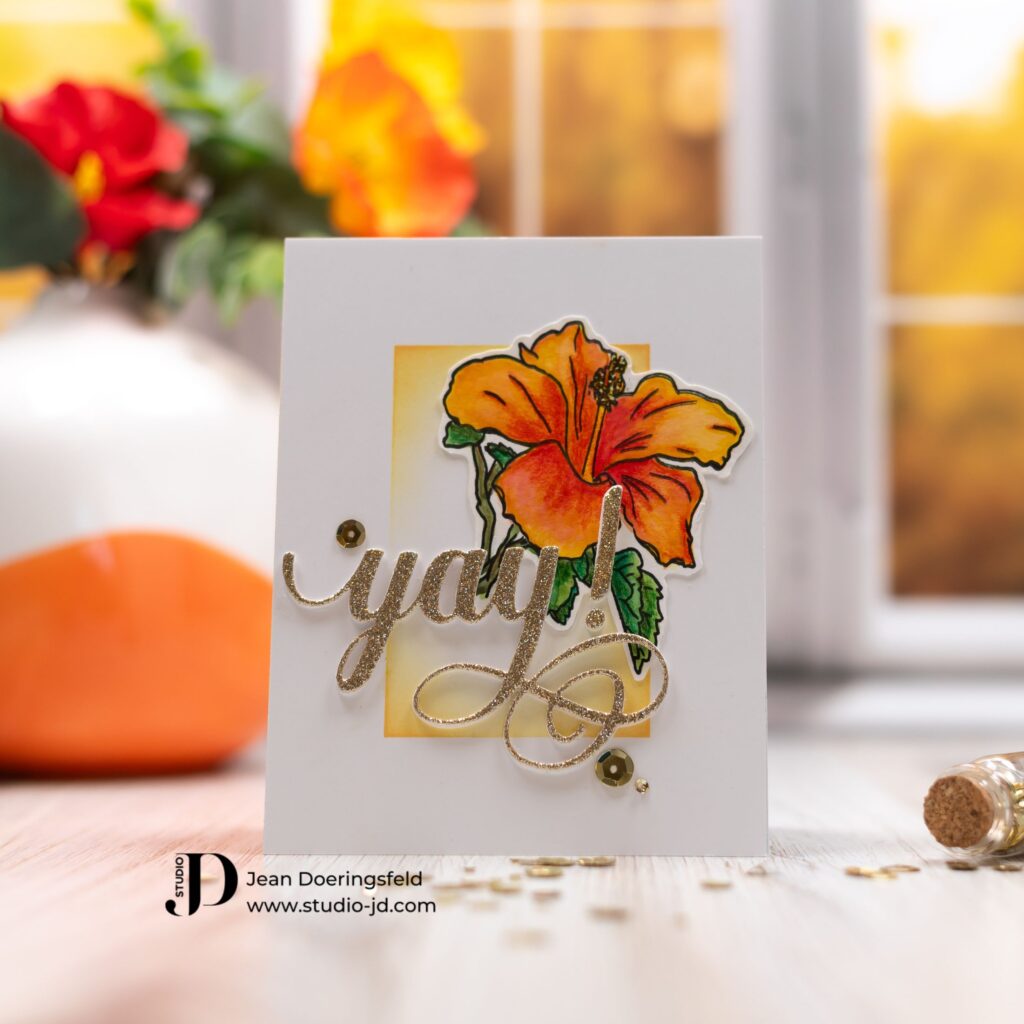
My cards today feature the Altenew Paint-a-Flower Hibiscus Outline Stamp Set. This set features two gorgeous hibiscus images so I thought I’d paint both of them and create two separate cards.
To make these cards:
- Stamp your hibiscus images on watercolor paper using watercolor-friendly ink that won’t bleed when wet.
- Begin by painting in a base color in a semi-wet form and letting it dry (note: it is hard to tell you how much water to use for this base color, but basically you want it to be the consistency of milk).
- Begin layering in color in slightly thicker forms (think: half-n-half to heavy cream consistency). Note that when you add in color, the base colors (or colors under it) will reactivate a bit, allowing you the ability to mix/blend the colors.
- Let your images dry completely and add in/adjust your colors if needed.
- Add in a few details and shading using Altenew Woodless Coloring Pencils.
- Cut out your images.
- Make your card fronts by masking off rectangles on each card base – I used a 1” border for one and a ½ “ border for the other.
- With the masking in place, gently ink-blend the corners and edges with Warm Sunshine and a tiny bit of Caramel Toffee.
- Die cut your sentiments out of glitter cardstock and add foam adhesive – or layers of cardstock – behind it. I die cut the sentiments from foam sheets.
- Arrange your flowers and your sentiments on your card fronts and adhere them with liquid glue.
- Add a few gold sequins for some shine!

I hope you liked these projects and I appreciate you joining me on my learning journey into gouache!
Don’t forget to head over to my Instagram for details on the Altenew $25 gift card giveaway!
I hope you have a wonderfully creative day!

0 Comments