

Hi there!
I love foiled accents on my cards. I feel like they can elevate an otherwise basic card and make it shine (in more ways than one).
But foiling can be tricky. And if you’ve ever tried foiling – whether it is hot foiling or toner/transfer foiling – you’ve probably made a few attempts that just didn’t work out the way you wanted them too. This card is the result of one of those less-than-stellar attempts and I thought I’d share with you what I did to “fix it”.
This card uses one of the new Diamond Circles Foil Transfer Cards from Simon Says Stamp. I love the design of these and was excited to use them. Each package includes 4 cards so they are also a great value.
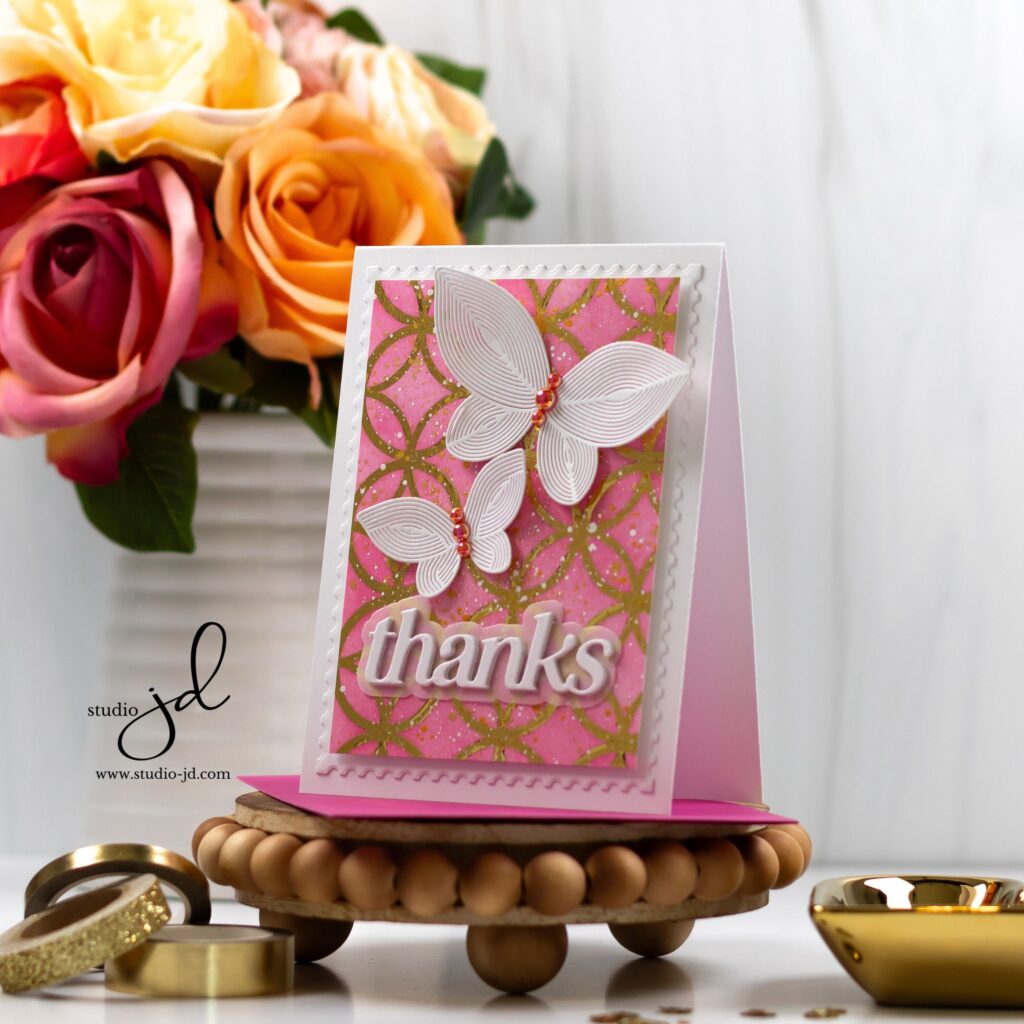
Since these are foil transfer cards, I used shiny gold toner foil and my Minc to foil them. But I messed up. I somehow got the foil crinkled when it went through the Minc. This meant that the panel was foiled in some areas and not in others. The unfoiled areas show up as black. I tried running it through the machine again, but I still had black gaps in the foiling.
Now, I could have just tossed it and tried using one of the other cards in the package but I’m a bit stubborn and I was irritated at myself for not watching more carefully so I decided I had to fix it and make it work.
My favorite way to fix toner foiling issues is with a black gel pen. I simply applied the gel over the black, unfoiled areas and let it dry (you have to let it dry or it will spread). Then, I ran it through my Minc again with more foil. The foil sticks to the gel penned areas and covers any of the exposed toner.

But… the newly foiled areas turned out to be shinier and smoother than the originally foiled areas, which made my poor foiling look… less bad, but still not right. <insert heavy sigh here>
I was still determined to use this panel (I can be really stubborn about things) so I thought I’d see how it looked after ink-blending.
I liked it better. Ink blending is magical, after all, but I was still a little frustrated by the differences in the foiled parts of the pattern.
So, I decided to splatter the panel with gold and white!
The splatters added to the texture of the panel and made the panel so stunning with lots of different types of shine and interest.
I’m not always this stubborn about my crafting (<- ok, that’s a lie) but I am super glad I stuck with it. I think this card is gorgeous and the different textures of shine really make the card.
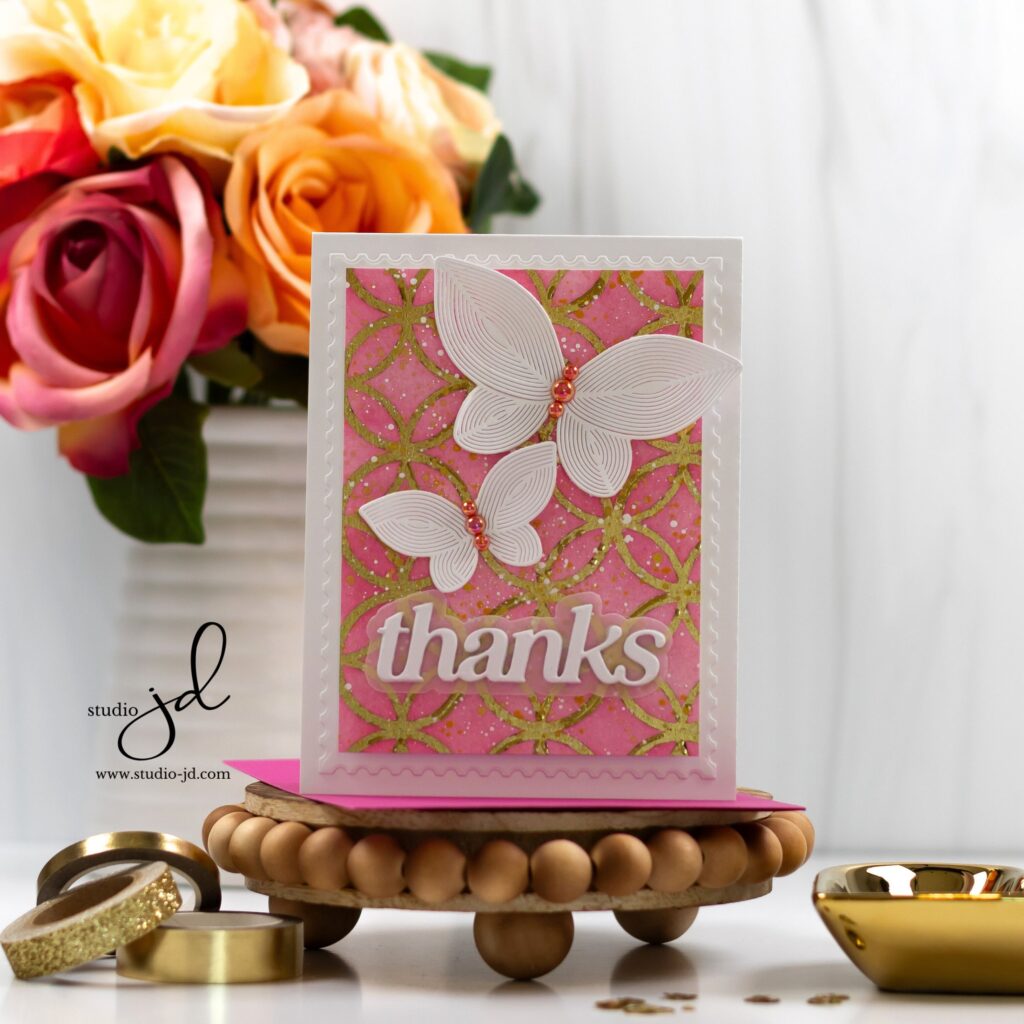
And now I didn’t want to cover up all the goodness, so I added some simple white butterflies and a sentiment, along with a few gems and that was all this card needed!
I hope you like it!
Have a wonderfully creative day, everyone!

0 Comments