

#ad
Hi there!
How long does it take you to make a card? For me, it can be a few hours…or a few days. Like this card, for example. It took 4 days. I had the gorgeous, embossed background made and just could not figure out what to do with it. I would look at it, set it aside, work on another card, then pick it up and look at it again. A couple nights I even looked at it before going to bed but all that did was keep me awake.

And you know what? I was perfectly happy with all of that (except maybe the lack of sleep). I love the design process. Sometimes things come quickly and sometimes they take a bit more time. While I was trying to figure out what I wanted to do with the background for this card, I came up with at least 20 ideas for other projects that I can use later. Pro Tip: It pays to keep a notebook beside your bed.

Does this card *look* like it took 4 days to make? Probably not. Sometimes it just works out that way – the cards you think about the hardest end up being the ones that have a simple design. Of course, it goes both ways. I’ve had cards that took me under an hour but looked like they took 4 days. Sometimes you win…sometimes you win (there is no losing when you make something by hand).
To make this card:
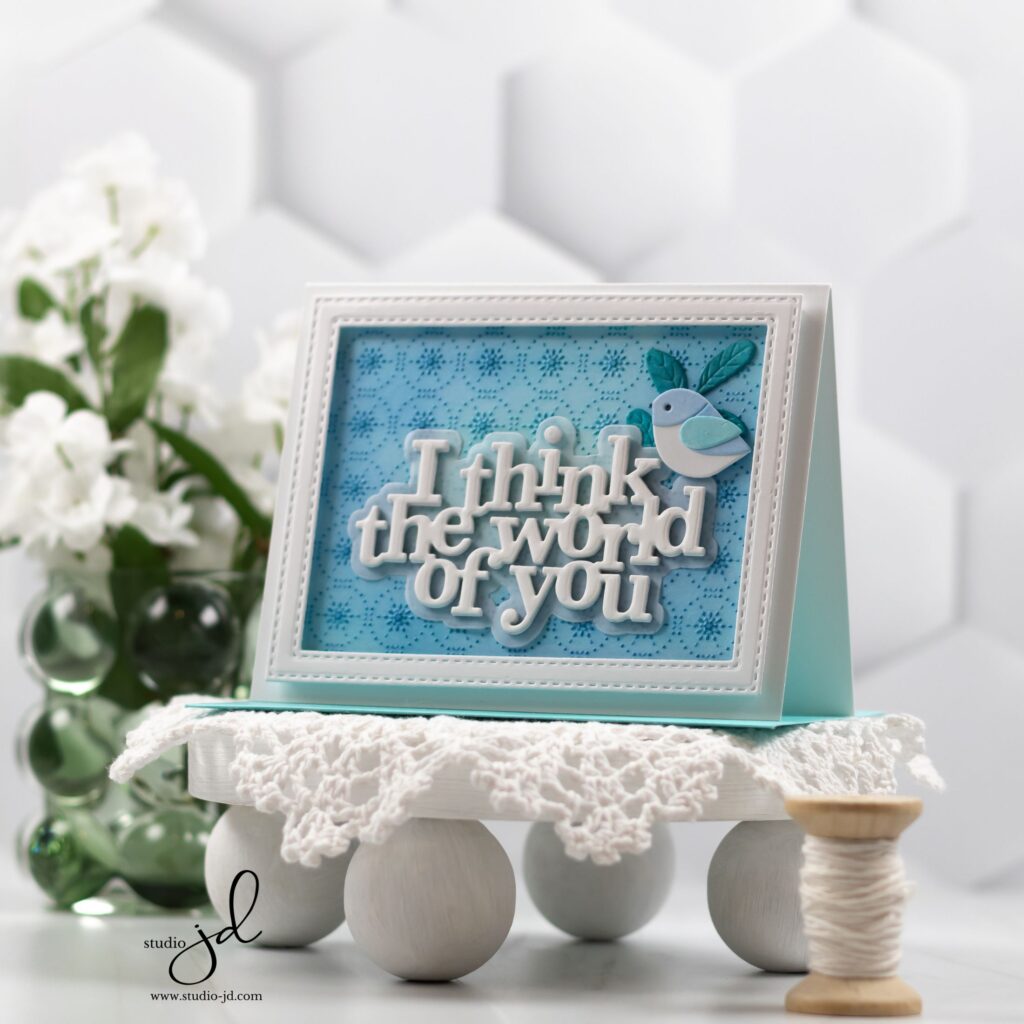
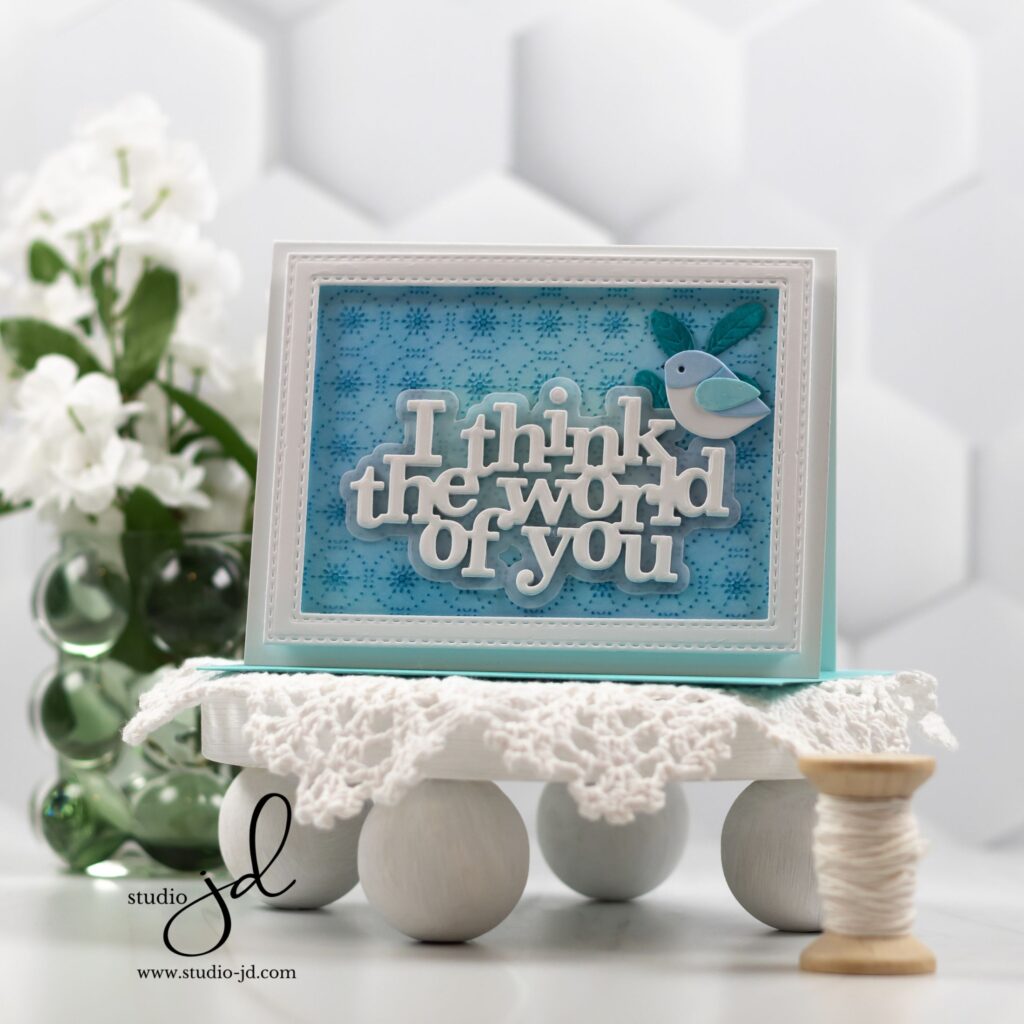
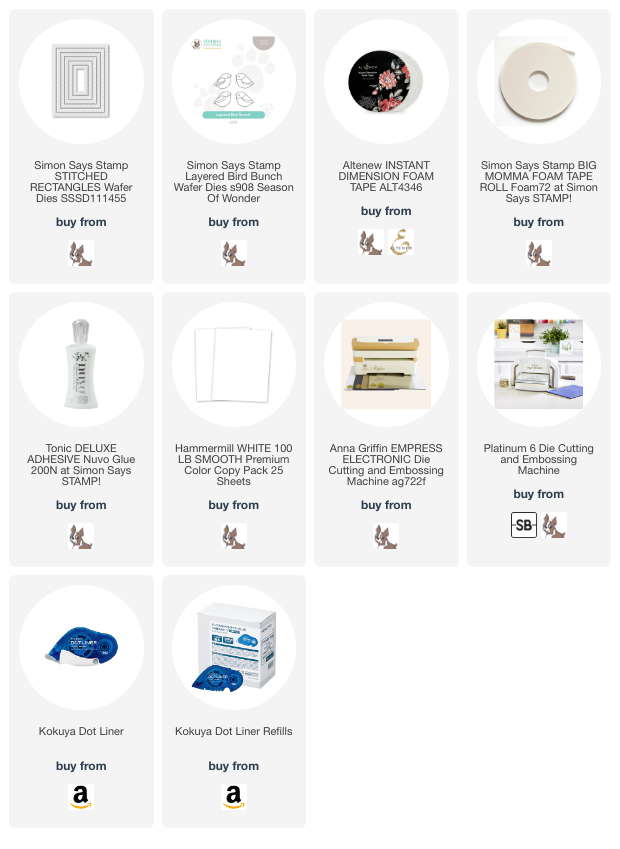
- Emboss a panel of white cardstock with the Tessellating Snowflakes Embossing folder.
- Use blending brushes in teals and blues to lightly go over the embossed image. You’ll notice that the color is darkest on the embossed design and lighter on the debossed portion. Continue to blend over the panel until you get the color intensity that you like. I used a darker teal (more of a blue) on the outside of the panel, and a lighter teal toward the center.
- Think about your panel for 4 days. <just kidding>
- Create a frame using stitched rectangle dies and trim your embossed panel so that it fits the frame.
- Die cut your sentiment several times out of white cardstock and adhere them together with liquid glue.
- Die cut the shadow die for your sentiment from vellum.
- Adhere the stacked sentiment to the vellum shadow die cut.
- Adhere your embossed panel to your card front, then use foam adhesive to add the frame.
- Adhere your sentiment so that it centered in the lower half of your frame.
- Add a few other die cuts to the card front – I used a layered bird and a leftover greenery diecut I had from a Christmas card I made. I popped the bird up with foam adhesive.
Creating takes time. How long? Well, it really doesn’t matter, does it? As long as you love doing it, then a card that takes 4 days to make is really the same as 4 days of joy. Pretty hard to beat that, isn’t it?!
Have a wonderfully creative day, everyone!

0 Comments