

#ad
Hi everyone!
This winter seems to be *the* winter for colds and flu. Almost everyone I know has suffered through some form of it. I’ve been lucky to avoid it, but then, I work from home, I craft from home, and I don’t have any children around – so it’s not like I get exposed to much. Still, I take all the usual precautions – washing my hands, drinking lots of fluids, and filling up on Vitamin C. I hate being sick so I’ll do everything I can to avoid it.
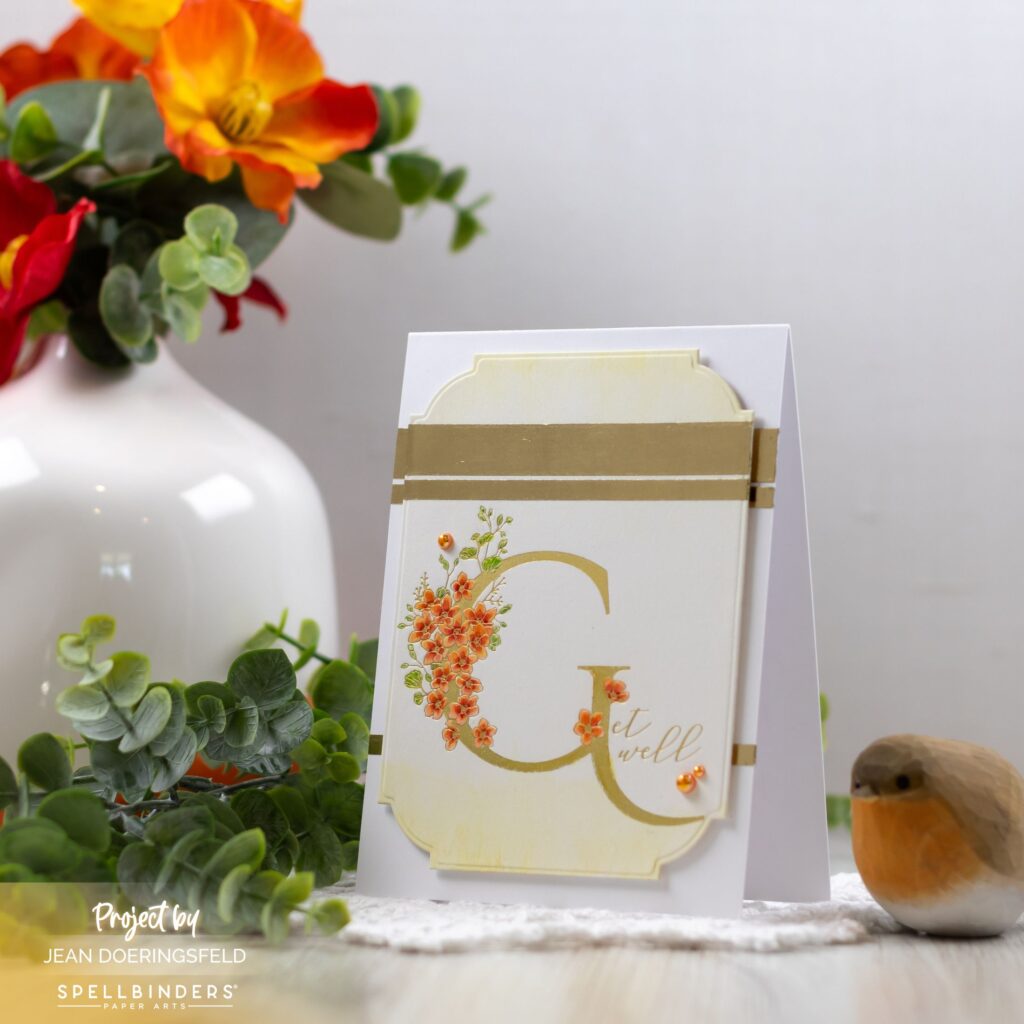
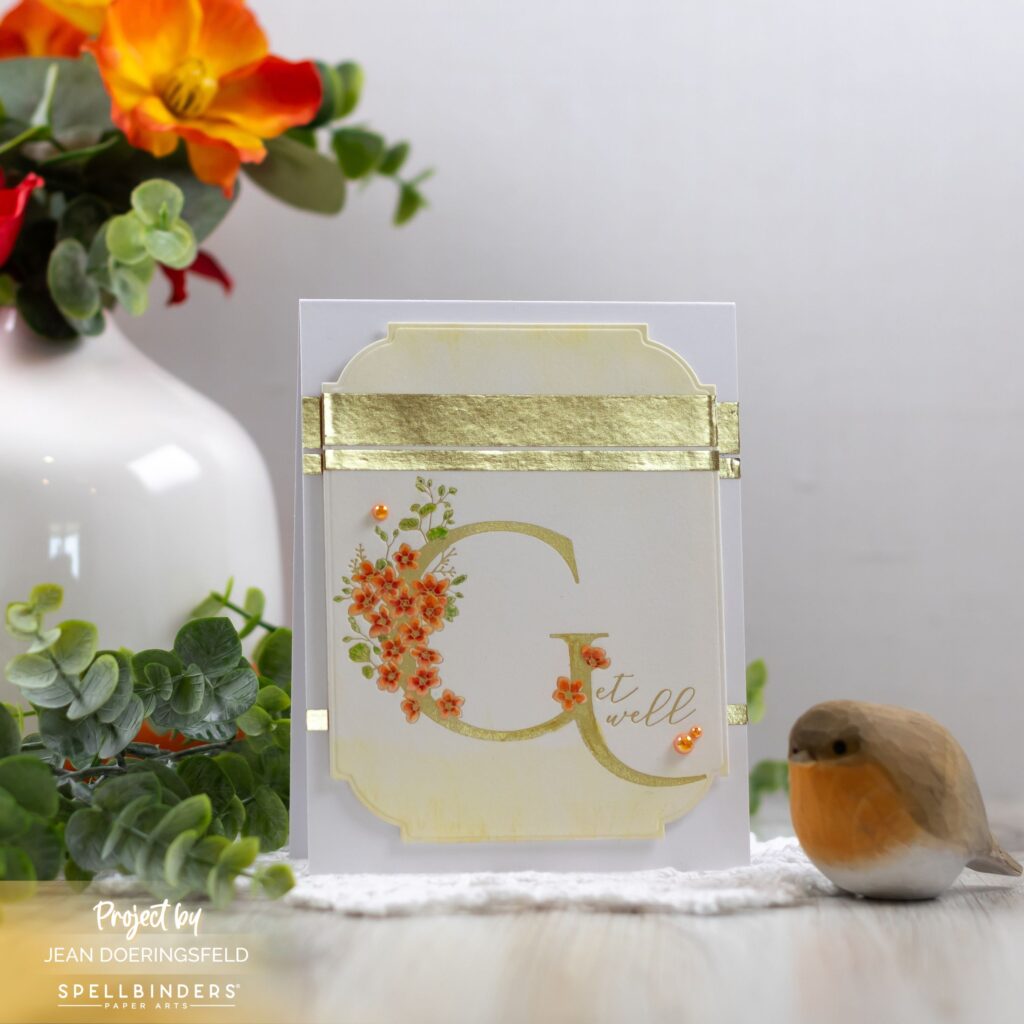
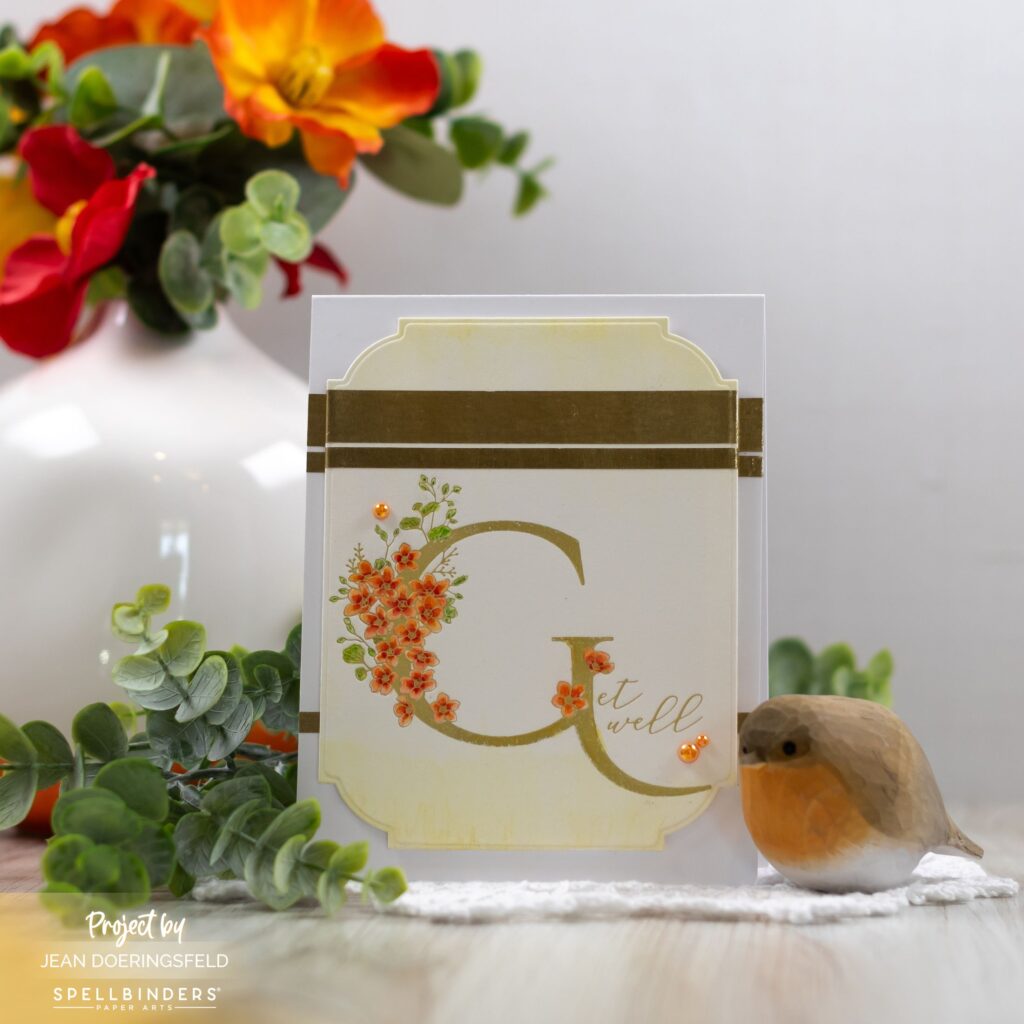
All that cold and flu stuff going around has depleted my “Get Well” stash so when Spellbinders reached out about creating with one of the new Every Occasion Floral Alphabet BetterPress Plates, it was a no-brainer to pick “G” for Get Well.
If you’re not familiar with BetterPress, it is a new form of metal plate that can create a letterpress (debossed) image into paper – but these plates can also be used for hot foiling, which makes them super versatile!
For my card today, I chose to hot foil the plates using matte gold foil on BetterPress paper. I would not have needed the BetterPress paper because I wasn’t looking for a letterpress look, but I love this paper because it hands up well to watercolor techniques and that is what I wanted to do with this card.
To make this card (all supplies linked in the Supply section below):
- Die cut a panel of BetterPress or watercolor card stock using the Notched Corner Frames dies.
- Use your Glimmer Hot Foil machine to hot foil the BetterPress plate using matte gold foil.
- Use your Inktense Colored Pencils to lightly color the image using light colors.
- Use a water brush or paintbrush with a fine point to “activate” the Inktense colored areas – avoid areas that are right next to each other so that you don’t mix colors unintentionally.
- Once dry, go back in with your Inktense Colored pencils in darker shades to add shadows.
- Activate those areas with a waterbrush or paint brush and let dry.
- You can repeat adding color and activing until you have your desired colors.
- Once the panel is completely dry, use an Inktense pencil to lightly color across the top and the bottom of the panel and activate the color, spreading it out to the open area of the panel.
- Add strips of gold washi tape to the card base and across the top of the panel so that they will line up when assembled.
- Add the panel to the card front using foam adhesive.
- Add a few gems for even more shine!
I hope you’ve been able to avoid the cold and flu this season and if not, I hope you get well quickly!
Have a wonderfully creative day!

0 Comments