

Hi everyone!
Can you believe it’s already time to start making your Halloween cards? I love Halloween – it’s one of my favorite holidays for card making! Of course, that doesn’t stop me from holding on to every last drop of summer that I can! 😉
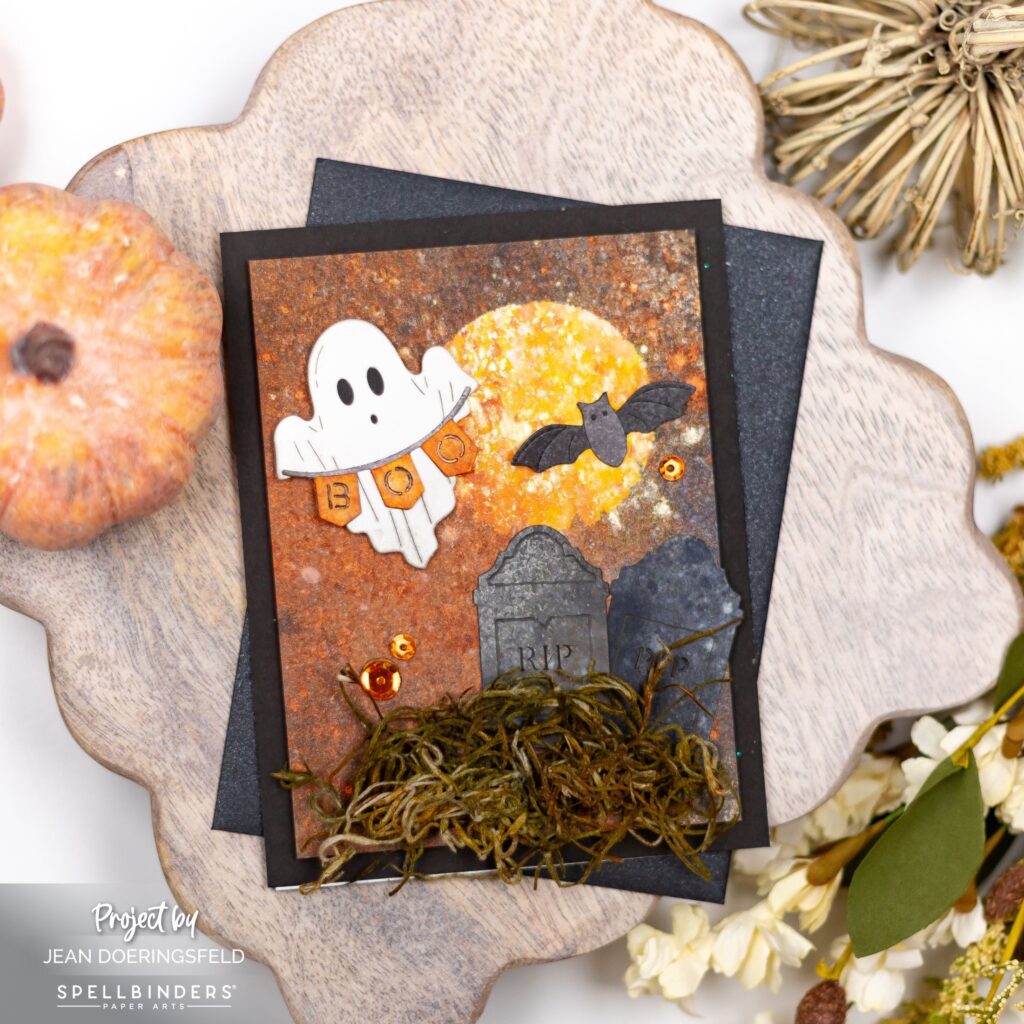
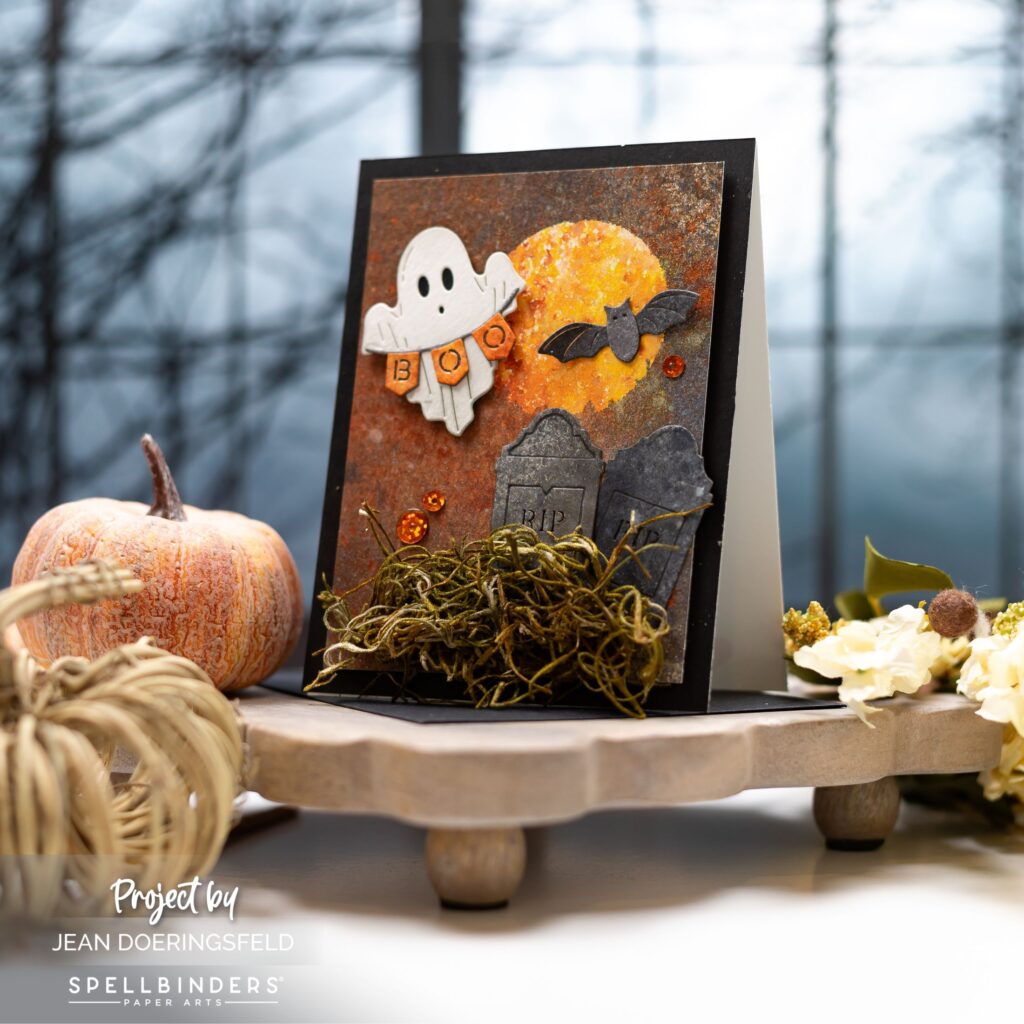
My card today is so fun! And a little messy (which was part of the fun)! I hope you enjoy it and that you’ll try something similar for your own cards.

To make this card:
- Spray a piece of 3.75 x 5-inch watercolor cardstock with Distress Spray Stain and Distress Mica Sprays using colors you want to show up in your moon. I used Antique Linen, Harvest Moon, and Burning Ember to get a wonderful yellow and gold moon with a little of orangey-red. Tip: When you use the sprays, start with one color, spritz with water, let dry, add another color and repeat. You can certainly do several colors together but that will give you a different effect.
- Leave the panel to dry completely! I left mine overnight.
- Die cut a circle out of masking paper that you can use for the moon.
- Place the mask on a piece of watercolor paper wherever you want your moon to be.
- Now spray the panel again with the darker colors.
- Leave the panel to dry completely, then remove the mask. You should now have a gorgeous moon on your panel!
- Adhere the panel to piece of black cardstock (4.25 x 5.5) using foam adhesive.
- Adhere the full panel to a card front.
- Die cut the remaining adornments and add color to them any way you like. I used sprays again for everything except the ghost (which I ink blended just a tiny bit on the edges), but you could easily ink blend them all or just use colored cardstock. Remember that if you spray them you need to wait until they are dry before handling them or you will get ink on everything (ask me how I know!).
- I used a bit of Spanish Moss to anchor the gravestones on my card. The moss comes in a light color so I sprayed it with Distress Spray and let it dry before adding it to the panel.
- Assemble your die cuts and arrange them on the card front. Use foam adhesive wherever you would like a bit of dimension (I used it behind the ghost).
- Add a few orange gems for some shine!
Thank you so much for stopping by my blog today! I hope this card inspires you to get a start on your Halloween cards or just have fun playing with some ink sprays! They are a great way to have some messy fun!
I hope you have a wonderfully creative day!

Love this card! Awesome background and colors, and the banner-holding ghost is so fun!