Hi everyone!
I think I mentioned in a previous post that I sometimes have a hard time choosing the right colors to use for my cards. Well, this week I took the next class in my AECP Level 2 training called “Color Your Day”. This class taught several incredibly useful techniques for helping you choose the right color combinations for your projects.
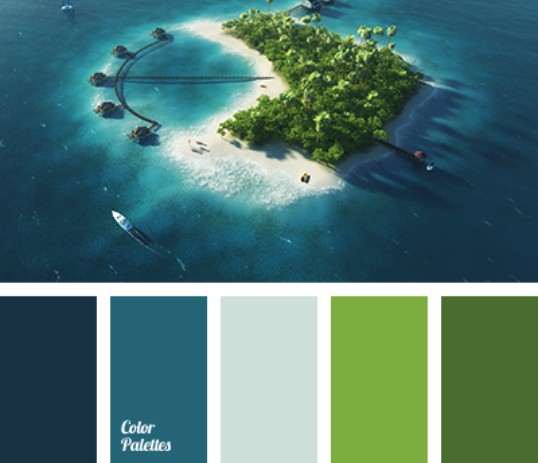
For this card, and my assignment for this class, I chose the lesson on using a photo inspiration as the basis for my colors. Here is the photo I chose from Color Pallets:

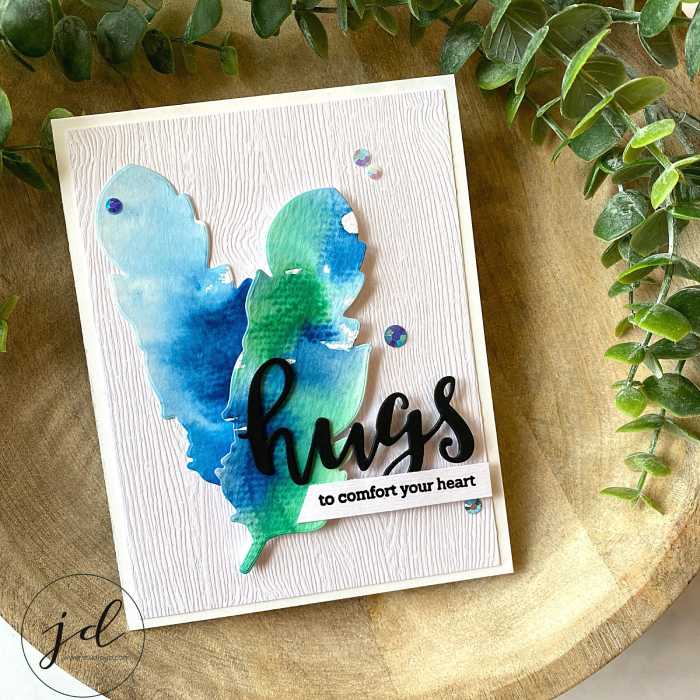
This card is very clean and simple – but that fits my style and is exactly what I was looking for for this assignment. I love how the color pops on the white background and how the textures of the woodgrain panel and the watercolor card stock add to the overall effect.

Prep your panel:
1. Cut a piece of white woodgrain card stock just slightly smaller than your card front.
Create your feathers:
2. Using 2 pieces of watercolor cardstock (each big enough to accommodate the feather dies), use your watercolor brush markers and a wet paintbrush to smear color onto the paper. I used Emerald and Desert Night for my colors. Keep in mind that you are not looking for 100% coverage – a few white areas are just fine and will add to the look. Let dry completely before moving on to step 3.
3. Once your water colored cardstock is dry, die cut 2 feathers from the areas you like the most.
Create your Sentiments:
4. Cut the “Hugs” die out of black cardstock.
5. Stamp your sentiment in VersaMark ink onto a strip of white cardstock and heat emboss it with detail black embossing powder.
6. Arrange your sentiment strip on your “Hugs” die cut and glue with liquid glue. Let dry.
Assemble the card:
7. Add foam tape to the back of the feathers and arrange them where you want them on the woodgrain panel.
8. Determine your placement for the sentiments. Because I wanted my sentiment to partially overlap with the feathers and the feathers were popped up using foam adhesive, I needed to add foam adhesive to the parts of the sentiment that were not overlapping the feathers and liquid glue to the parts that did.
9. Adhere your panel to the card front.
10. Add a few gems for some shine!

All the best,


This is just incredible!!
Thank you for submitting your fabulous work to the AECP assignment gallery.
Thank you, Erum!