Hi everyone!
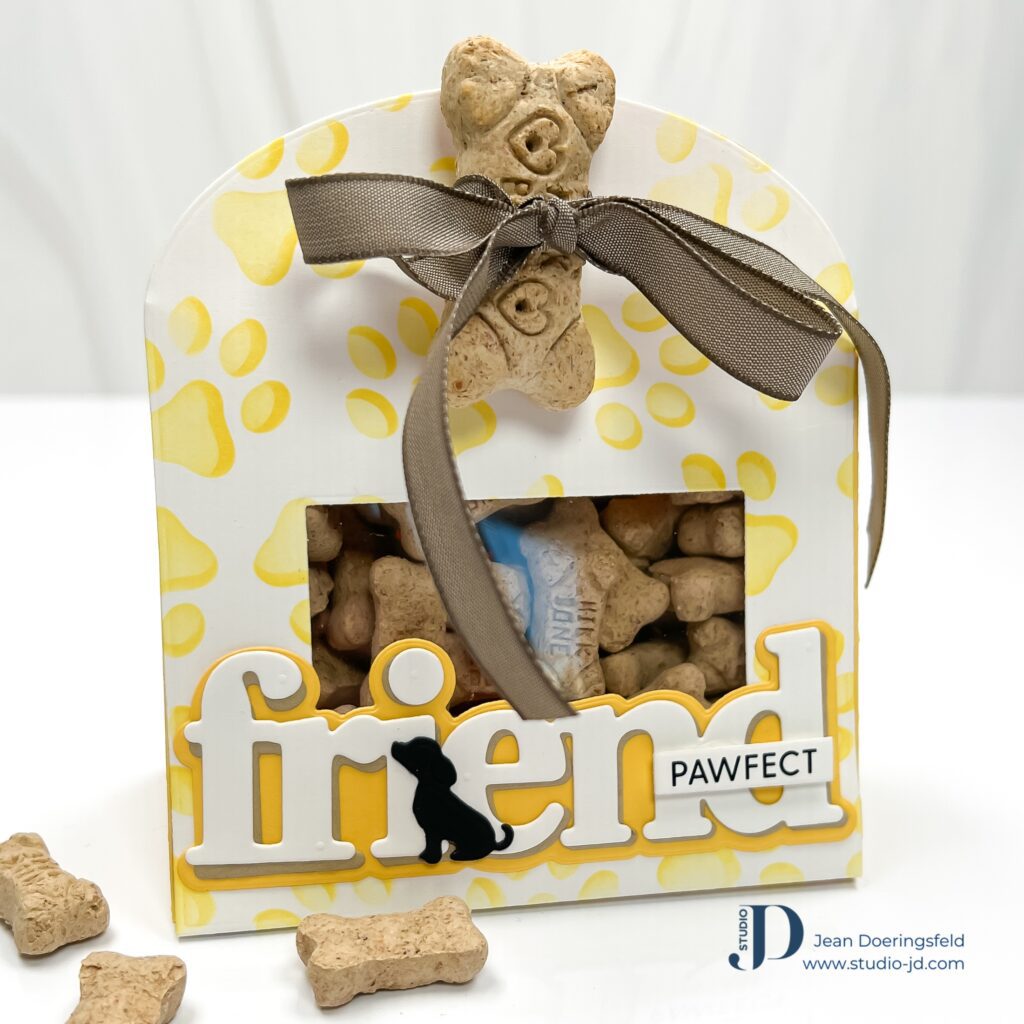
Today I’m sharing this super fun dog treat bag that I made using products from my Waffle Flower Sneak Peek Club Kit. The products in this kit are brand new and won’t be released to non-kit members until March 5th.
Most of you know that I absolutely love dogs (and pretty much all animals, but dogs, especially), so when I saw the items in this kit I knew I had to do something special with it. Often, I use these types of products to make “rainbow bridge” cards (cards for my friends when their beloved friend passes away) but today I decided to make something happy that I know all dogs would love – and their owners too! And, the cool thing about it is that you could easily adapt this project for any pet!

This treat bag came together quickly and was really easy to make!
To make this card:
- Ink-blend the paws onto a piece of white cards stock. I used two shades of yellow for my paws.
- Die cut the bag using the Waffle Flower Treat Bag dies – I cut it out once out of yellow cardstock and once out of the ink-blended paw print cardstock.
- Die cut the front window out of the paw print piece and adhere acetate behind the window.
- Die cut the “Friend” from white cardstock and from Kraft cardstock. Die cut the shadow from yellow cardstock.
- Adhere the white “Friend” to the kraft “Friend”, offsetting them just a bit so that the kraft shows underneath.
- Adhere the “Friend” to the yellow shadow die cut.
- Cut a dog silhouette from black cardstock and adhere to the “Friend”.
- Adhere the “Friend” to the front of the treat bag under the window.
- Add the “pawfect” subsentiment to the “Friend” with foam adhesive.
- Assemble the treat bag, add some treats, and tie it with a ribbon and a bone-shaped treat.
I hope you like this project and that it inspires you to make a treat bag for your pet!
Have a wonderfully creative day!






0 Comments