

Hi everyone!
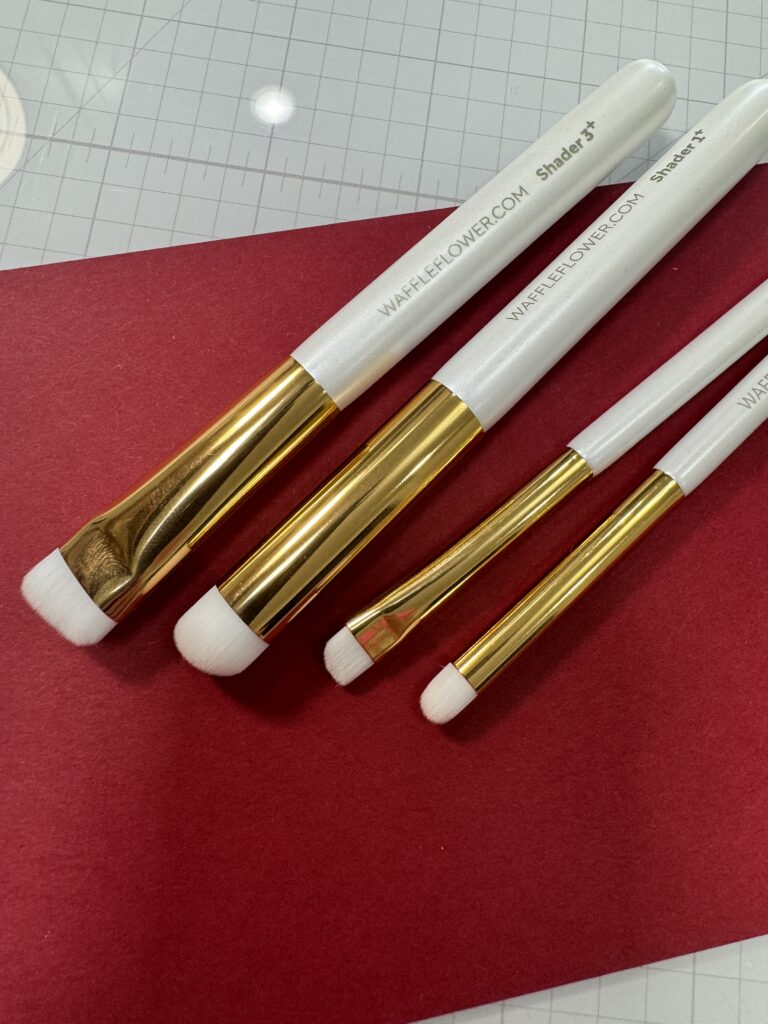
Do you love ink-blending? I know I do! It has become one of my most favorite – and most used – crafty techniques! That’s why I’m super excited about the new Waffle Flower PLUS shader brushes and I think you will be too! These new PLUS brushes allow you to put down a dense layer of ink quickly and are a perfect complement to the original Waffle Shader brushes and Blending Brushes.
The 0+ and 1+ brushes were released in October, but this month Waffle Flower released the 2+ and 3+shaders, along with a new PLUS sampler pack so you can try them all!
Waffle Flower generously sent me the new PLUS brushes to test out and I absolutely love them!
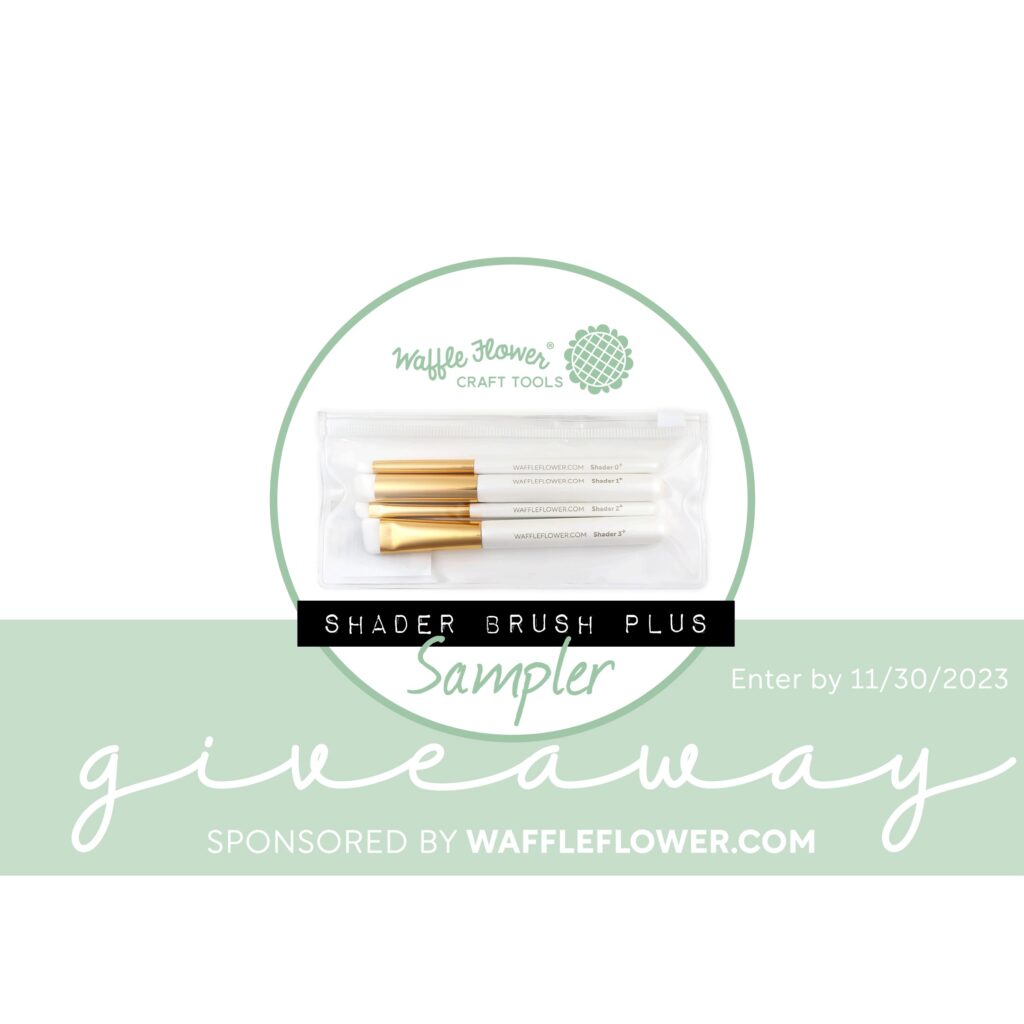
GIVEAWAY! GIVEAWAY! GIVEAWAY! GIVEAWAY!
I’ve partnered with Waffle Flower to give 1 lucky winner a Waffle Flower Shader Brush PLUS Sampler Pack!Head over to my Instagram Account for all the details!
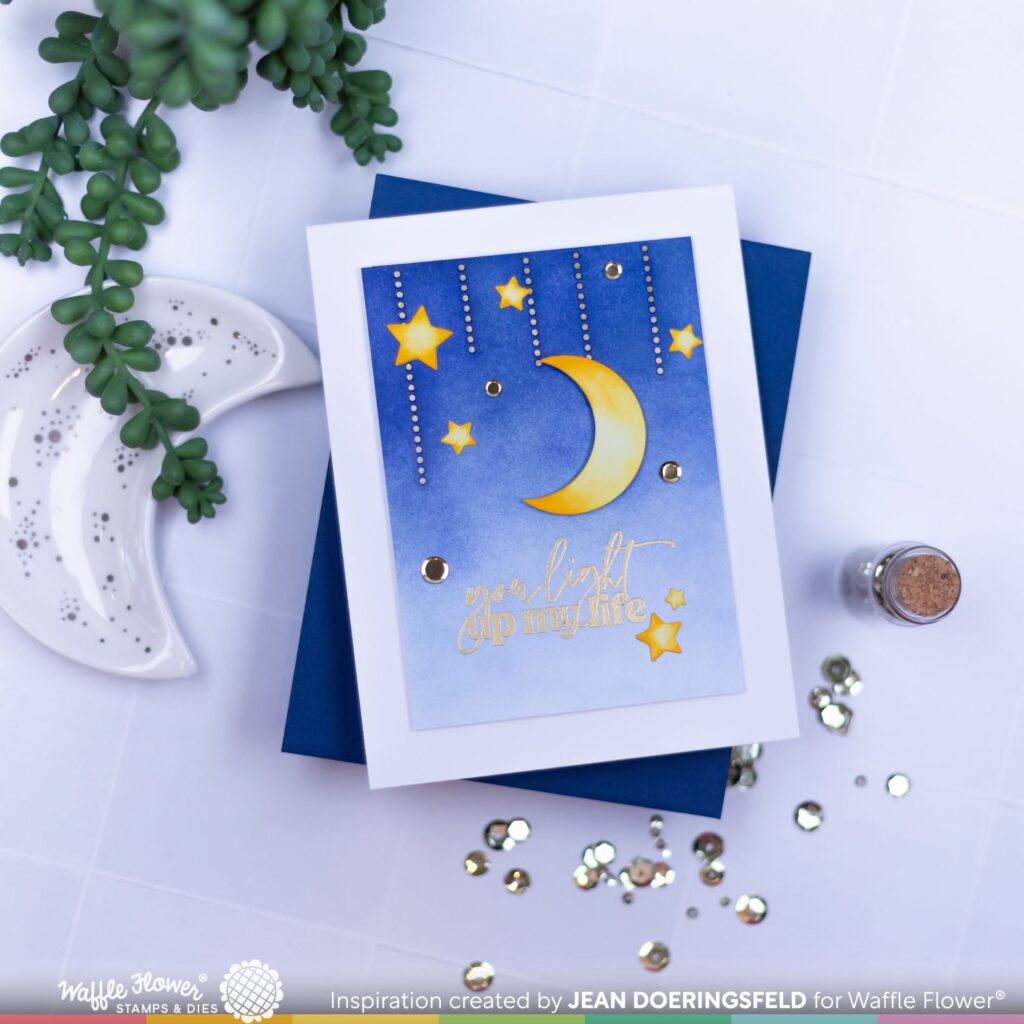
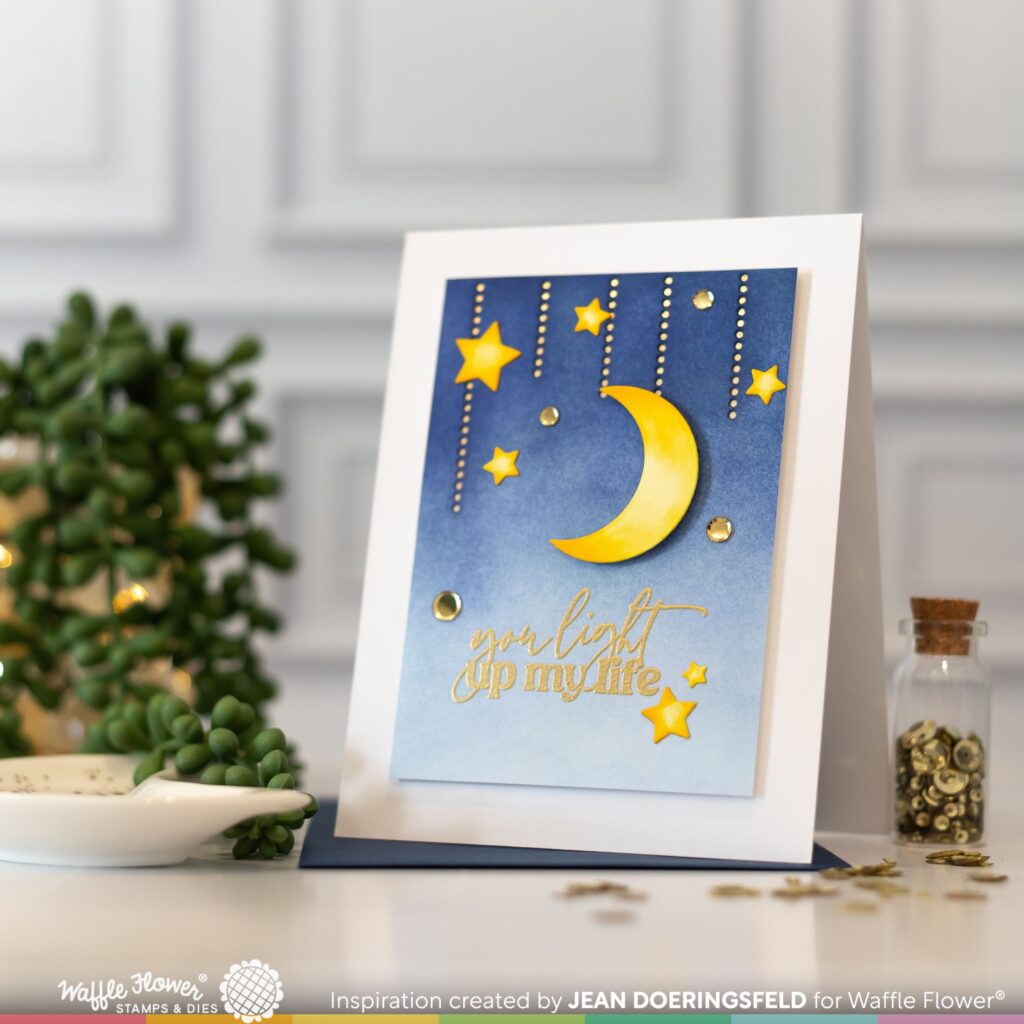
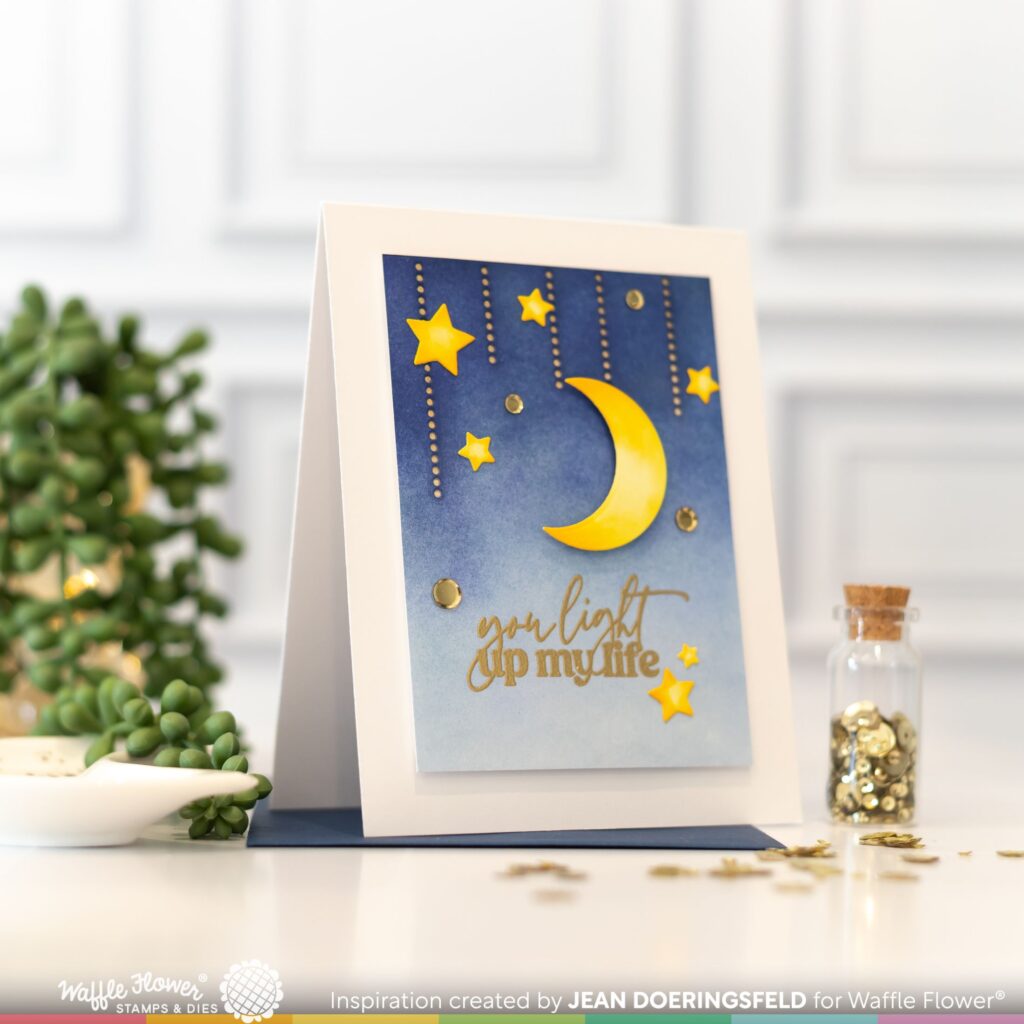
I’ve used these new PLUS brushes on several projects you’ll see over the next month but today I wanted to share this sweet and SUPER EASY card featuring a moon- and star-lit sky.
For the background on this card, I die cut the Dotted Night Scene sky out of a card panel. I then ink-blended the blue night sky on the full die cut panel using the regular Waffle Flower Blending Brushes.
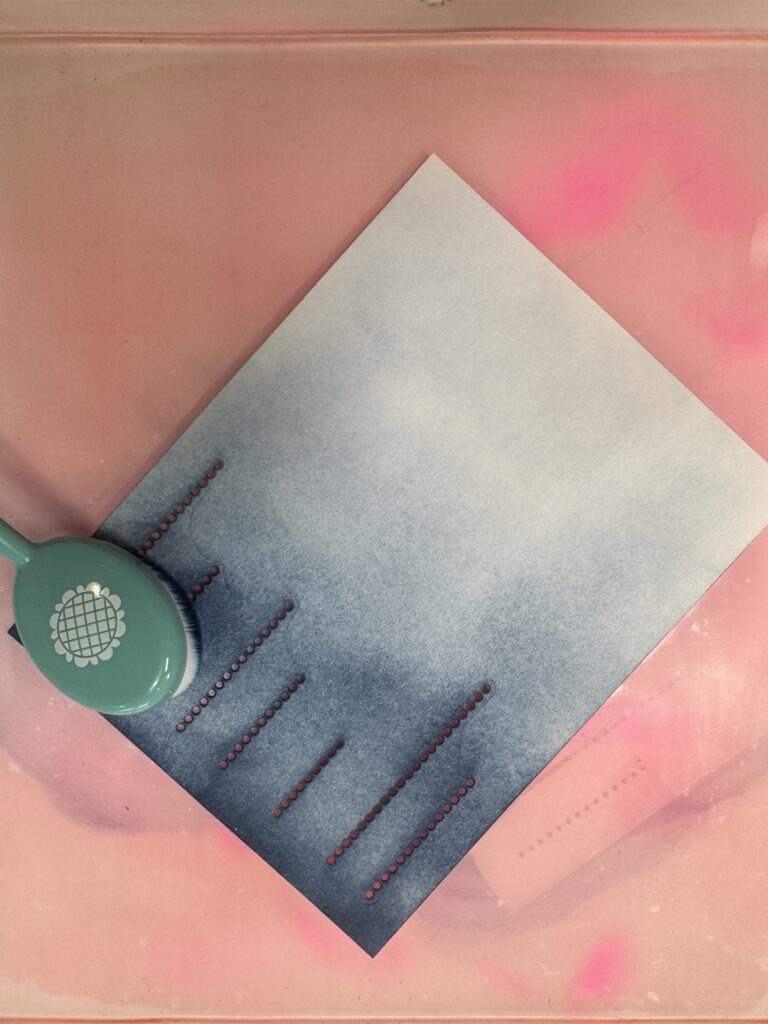
With the base color in place, I went back in using Shader Brush 1 PLUS to make the areas over the dotted lines darker. The brush worked perfectly to add that deeper, denser color in just the area that I wanted it. I was able to easily feather the color out to blend in with the rest of the panel with no lines. I love that you have more precision over your ink-blending with these smaller brushes.
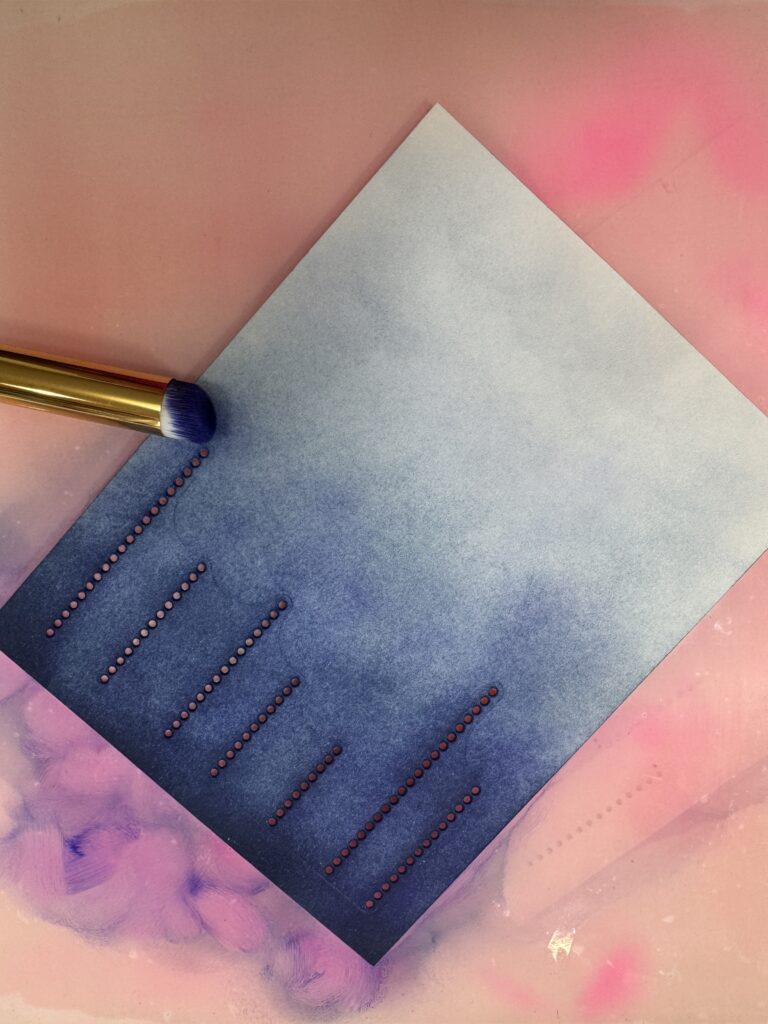
I trimmed the night sky panel down and backed it with gold cardstock so that pops of gold could be seen through the die cut dots in the panel.
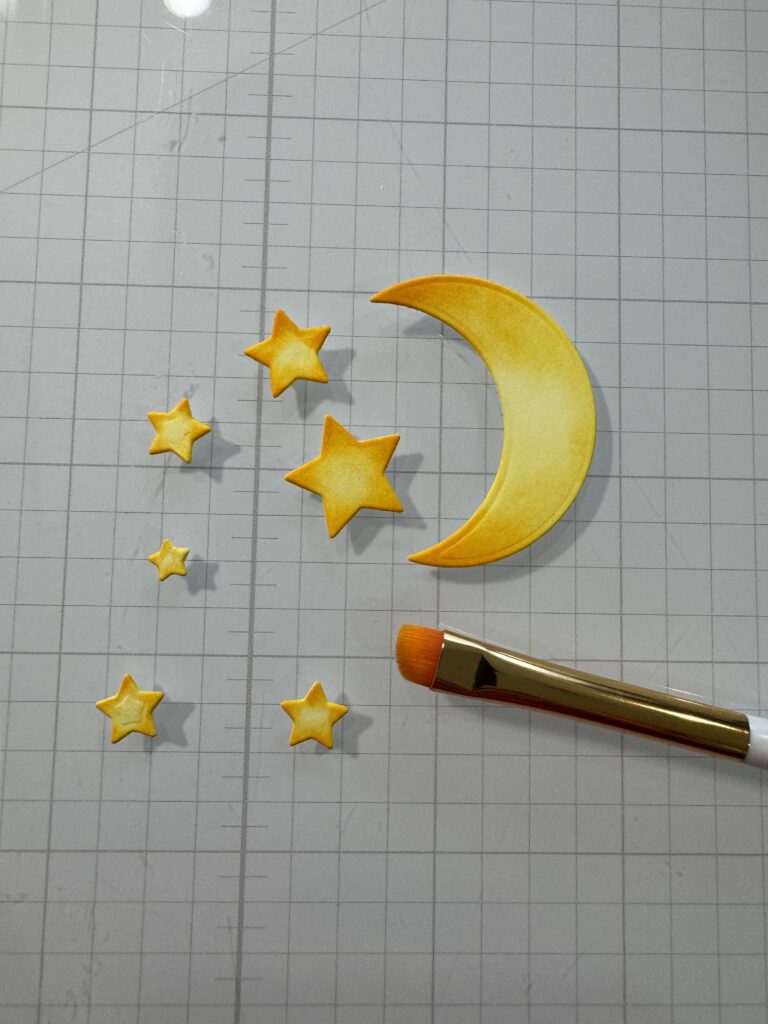
Next, I die cut the moon and stars and followed a similar process – first ink-blending them with the Waffle Flower Blending Brushes and then going back in to add deeper/darker color – on the tips of the stars and the points of the crescent moon – this time using the smaller, 2+ Shader Brush.
I added heat embossed the sentiment in gold and then assembled everything on a card front, then finished it with a bit more gold sparkle!
I hope you’ll you’ll head over to Instagram for a chance to win the GIVEAWAY! I know you’ll love these new shader brushes!
Have a wonderfully creative day!

0 Comments