

AD: DT Post
Hi everyone!
I can’t believe it’s June already! My May was so busy it went by in a flash!
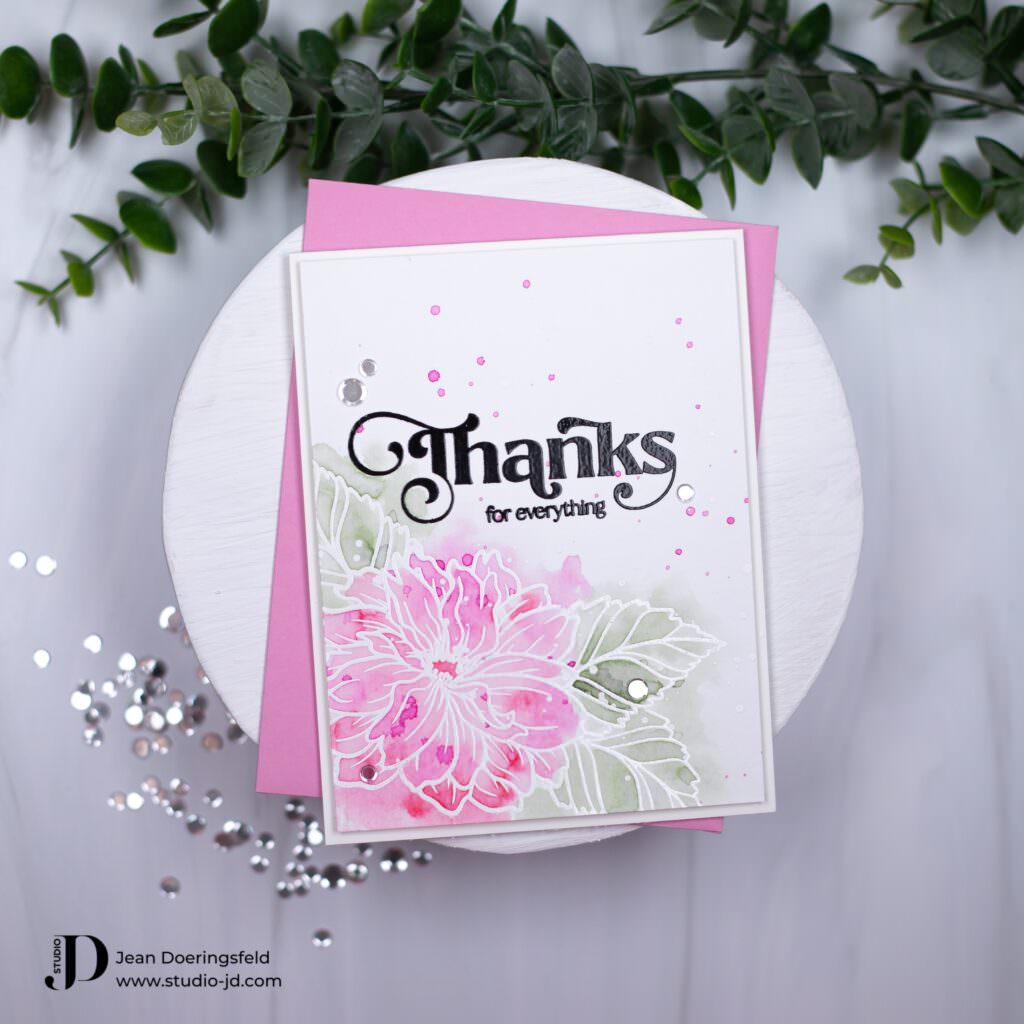
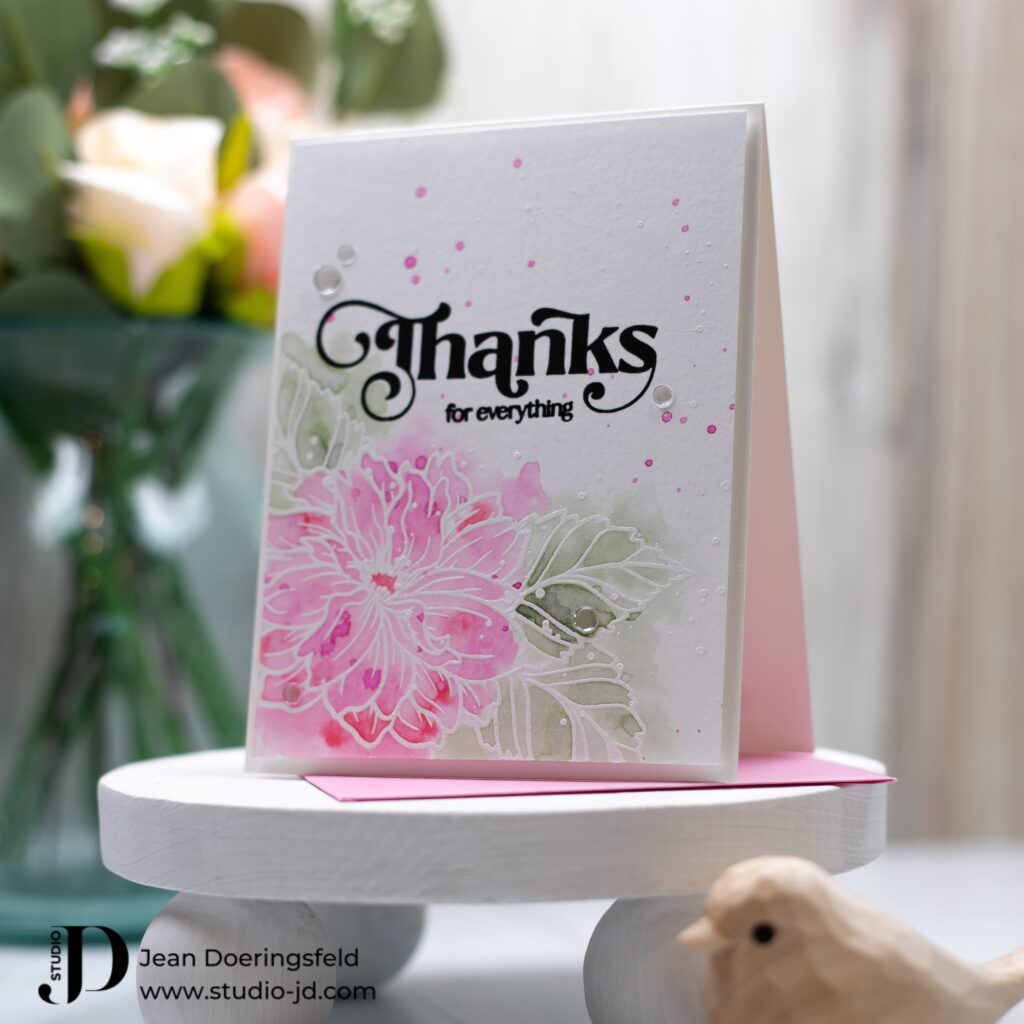
Today, I’m just popping in quick to share another messy watercolor card with you! This one features one of the larger blooms from the Blissful Bouquet stamp set and another gorgeous sentiment from the Elegant Modern Greeting set (both sets are part of the current Simon Says Stamp “Dear Friend” release).
To make this card:
1.Heat emboss the large bloom in white on watercolor paper.
2.Stamp the same bloom in black (or other color) onto masking paper and fussy cut it
 out.
3.Place the mask over the heat embossed bloom, then stamp one of the leaves and
 heat emboss it with white.
4.Stamp the same leaf in black (or other color) onto masking paper and fussy cut it
 out.
5.Being sure to use the masks where needed, stamp and heat emboss a couple more
 leaves in white.
6.Heat emboss the large Thanks sentiment using black pigment ink and clear
 embossing powder.
7.Heat emboss the sub-sentiment using black pigment ink and clear embossing powder.
8.Now that everything is embossed, you can begin water coloring. I smooshed several
 colors of Distress Ink (colors are in Supplies list below) onto my glass mat and used
 those as my paint palette. I wet the large bloom first, then began adding color with
 the lightest pink color first, here and there on the bloom – not worrying if I stayed
 inside the lines too much (but also trying to avoid the areas where I would be putting
 green since red and green, if they mix, can look muddy). I helped the bloom dry
 using my heat gun, applied more water and more color, working in layers, until the
 bloom was the color I wanted. I dried it completely before I used the same technique
 with the green on the leaves. By trying the layers of color and making sure that the
 image is dry before moving to the next color, you reduce the risk of getting color
 mixing that you don’t want.
9.Once the panel was completely dry, I splattered it with pink and let it dry again. I
 then splattered it with white.
10.You may want to gently wipe any splatters off your sentiment.
11.Trim the panel and adhere it to your card front.
12.Add a few gems for some sparkle.
I find messy water coloring to be so relaxing! Have you tried it yet? If not, I really hope you will – and that you’ll share your creations with me and others! I’d love to see them!
If you haven’t stopped by the Simon Says Stamp site and checked out the new release, I really hope you will! It is truly fantastic!
Have a wonderfully creative day, everyone!

Beautiful card and watercoloring! Really appreciate your step by step instructions!